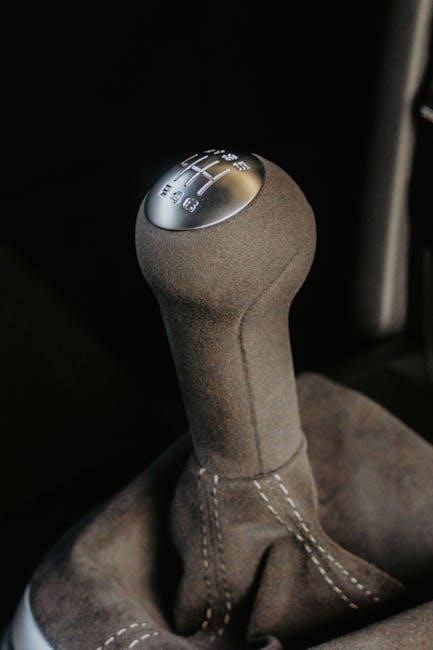
Maintaining a manual gearbox necessitates periodic oil changes, typically every 30,000 to 60,000 miles, ensuring smooth operation and preventing premature wear of internal components.
Neglecting this crucial maintenance can lead to diminished performance, increased friction, and potentially costly repairs down the road, impacting the vehicle’s longevity.
Why Change Manual Gearbox Oil?
Gearbox oil, constantly subjected to immense pressure and heat, degrades over time, losing its vital lubricating properties and ability to effectively protect the intricate internal gears. This degradation stems from metal particles generated by gear wear, clutch material, and oxidation processes, all accumulating within the oil.
Clean oil is paramount for minimizing friction, reducing wear, and dissipating heat, preventing costly damage and ensuring seamless gear changes. As the oil ages, its viscosity changes, impacting its ability to create a protective film between moving parts.
Regular oil changes prevent the formation of sludge and deposits, which can clog oil passages and hinder proper lubrication. Ignoring these changes can lead to noisy operation, difficulty shifting, and ultimately, catastrophic gearbox failure, necessitating expensive repairs or even a complete replacement. Proactive maintenance, through timely oil changes, safeguards the longevity and performance of your manual transmission.
Understanding Gearbox Oil’s Role

Gearbox oil performs a multifaceted role, extending far beyond simple lubrication. It acts as a crucial heat transfer agent, absorbing and dissipating the significant heat generated by the meshing gears within the transmission. This thermal management prevents overheating and maintains optimal operating temperatures.
Furthermore, the oil provides essential corrosion protection, shielding internal components from rust and degradation caused by moisture and contaminants. It also offers vital protection against wear, forming a protective film between metal surfaces to minimize friction and reduce the rate of component deterioration.
Modern gearbox oils often contain additives designed to enhance these properties, including extreme pressure (EP) additives to withstand high loads and friction modifiers to improve shift quality. Maintaining the oil’s integrity is therefore critical for ensuring the gearbox operates smoothly, efficiently, and reliably throughout its lifespan.

When to Change Your Manual Gearbox Oil
Generally, manual gearboxes benefit from oil changes every 30,000 to 60,000 miles, though driving habits and vehicle age significantly influence optimal intervals.
Recommended Intervals Based on Mileage
For most vehicles with manual transmissions, a common recommendation is to change the gearbox oil every 30,000 to 50,000 miles (48,000 to 80,000 kilometers). However, this is a general guideline, and several factors can necessitate more frequent or less frequent changes.
Some owners, particularly those with older vehicles or those who engage in demanding driving conditions, prefer a more conservative approach, opting for changes every 30,000 miles or even more frequently. Conversely, drivers who primarily undertake gentle highway driving might extend the interval to 60,000 miles or even longer, as suggested by some owners manuals.
A 5-year interval is also frequently cited, regardless of mileage, as oil degrades over time even with minimal use. Ultimately, consulting your vehicle’s owner’s manual is the best starting point, but understanding your driving style and conditions is crucial for tailoring a suitable maintenance schedule.
Impact of Driving Conditions on Oil Change Frequency
Aggressive driving habits, such as frequent hard acceleration, deceleration, and spirited gear changes, significantly increase the stress on gearbox oil, accelerating its degradation. Similarly, regular towing, hauling heavy loads, or frequent off-road driving expose the oil to higher temperatures and increased shear forces.
These conditions demand more frequent oil changes, potentially halving the recommended interval to around 15,000 to 30,000 miles. Conversely, predominantly highway driving at consistent speeds, with minimal load, places less strain on the oil, allowing for extended intervals.
Driving in extreme climates – both very hot and very cold – can also impact oil viscosity and performance. Monitoring driving conditions and adjusting the oil change schedule accordingly is vital for maintaining optimal gearbox health and preventing premature wear.
Considering Vehicle Age and Model
Older vehicles, particularly those with higher mileage, often benefit from more frequent gearbox oil changes due to increased wear within the transmission and potential for internal contamination. Seals may degrade over time, allowing for increased friction and particle buildup within the oil.
Specific vehicle models can also dictate oil change frequency; some manufacturers, like Subaru Impreza owners, may find limited guidance in the owner’s manual and rely on community recommendations, such as every 60,000 miles or 5 years.
It’s crucial to research the specific needs of your vehicle and consider its history. A well-maintained, newer vehicle might tolerate longer intervals, while an older, heavily used vehicle will require more diligent attention to gearbox oil maintenance for optimal performance and longevity.
Tools and Materials Needed
Essential supplies include the correct gearbox oil specification, wrenches, a drain pan, a funnel, safety glasses, and gloves for a successful oil change procedure.
Gearbox Oil Type and Specification
Selecting the appropriate gearbox oil is paramount for optimal performance and longevity of your manual transmission. Refer to your vehicle’s owner’s manual or a reliable parts catalog to determine the correct viscosity grade and specification.
Generally, manual transmissions utilize GL-4 or GL-5 gear oils, differing in their additive packages and suitability for various gear materials. GL-4 is typically recommended for older vehicles with brass or bronze synchronizers, while GL-5 offers enhanced extreme pressure protection for modern transmissions.
Synthetic oils provide superior thermal stability and shear resistance compared to conventional mineral oils, extending oil change intervals and improving performance in demanding conditions. Ensure the oil meets the manufacturer’s specifications regarding API service classification and SAE viscosity grade, such as 75W-90 or 80W-90.
Using the incorrect oil type can lead to premature wear, shifting difficulties, and even transmission failure, so diligent research and accurate selection are crucial.
Essential Tools for the Job
Successfully completing a manual gearbox oil change requires a specific set of tools to ensure efficiency and prevent damage. A socket wrench set, including the correct size for the drain and fill plugs, is fundamental. You’ll also need a torque wrench to tighten the plugs to the manufacturer’s specified torque.
A drain pan with sufficient capacity to hold the old oil is essential, alongside a funnel for cleanly filling the gearbox with new oil. A pump or syringe can be beneficial for reaching the fill plug, often located in a hard-to-access area.
Gloves are recommended to protect your hands, and rags or paper towels are necessary for cleaning up spills. A jack and jack stands are crucial for safely lifting the vehicle and providing stable access underneath. Finally, wheel chocks enhance safety by preventing unwanted vehicle movement.
Safety Equipment
Prioritizing safety is paramount when undertaking a manual gearbox oil change. Always wear safety glasses to protect your eyes from splashing oil or debris. Nitrile gloves are crucial to shield your skin from prolonged contact with potentially irritating gearbox oil.
When lifting the vehicle, utilize a sturdy jack and always support it with jack stands – never work under a vehicle supported only by a jack. Wheel chocks are essential to prevent any accidental rolling during the process.
Ensure the work area is well-ventilated, as used gearbox oil can release fumes. Have a fire extinguisher readily available, though unlikely, as a precaution against flammable fluids. Finally, dispose of used oil responsibly at a designated recycling center, avoiding environmental contamination.

Step-by-Step Guide to Changing Gearbox Oil
Begin by safely lifting the vehicle, draining the old oil, removing the drain plug for inspection, and then refilling with the correct gearbox oil specification.
Preparing the Vehicle
Before commencing the gearbox oil change, ensuring the vehicle is adequately prepared is paramount for safety and efficiency. Begin by parking the vehicle on a level surface and firmly engaging the parking brake.
Next, safely lift the vehicle using a jack and securely support it with jack stands – never work under a vehicle supported only by a jack. Locate the gearbox drain and fill plugs; consulting your vehicle’s repair manual is highly recommended for their precise locations.
Allow the engine and gearbox to cool down sufficiently to avoid burns. Gather all necessary tools and materials, including the correct type of gearbox oil, a wrench for the drain plug, a pump or funnel for filling, and safety equipment like gloves and eye protection.
Finally, position a drain pan beneath the drain plug to catch the old oil, and have absorbent materials readily available to clean up any spills.
Draining the Old Oil
With the vehicle securely supported and the drain pan positioned, carefully loosen the gearbox drain plug using the appropriate wrench. Be prepared for the oil to be warm, even after cooling, and exercise caution.
Once loosened, fully unscrew the drain plug by hand, keeping slight inward pressure until the last thread to prevent a sudden gush of oil. Allow the old oil to drain completely – this may take 20-30 minutes – ensuring all sediment and contaminants are expelled.
Inspect the drained oil for any metal shavings or unusual debris, which could indicate internal gearbox wear. A small amount of metallic sheen is normal, but larger particles warrant further investigation.
During draining, consider gently rocking the vehicle to help dislodge any remaining oil clinging to the gearbox internals, maximizing the amount removed.
Removing and Inspecting the Drain Plug
After the old oil has fully drained, carefully remove the drain plug. Examine the plug’s threads for any damage or wear, and check the sealing washer (if equipped) for deterioration. A damaged washer should always be replaced to ensure a leak-proof seal upon reinstallation.
Pay close attention to any metal particles clinging to the drain plug’s magnet – this is a normal occurrence, as the magnet attracts metallic debris circulating within the gearbox. The amount of metallic paste provides insight into gearbox wear.
A significant buildup suggests increased internal friction and potential component degradation, potentially requiring further inspection or repair. Clean the drain plug thoroughly with a parts cleaner, removing all old oil and debris before reinstallation.
Ensure the drain plug’s sealing surface is clean and free of imperfections to guarantee a proper seal and prevent oil leaks after the new oil is added.
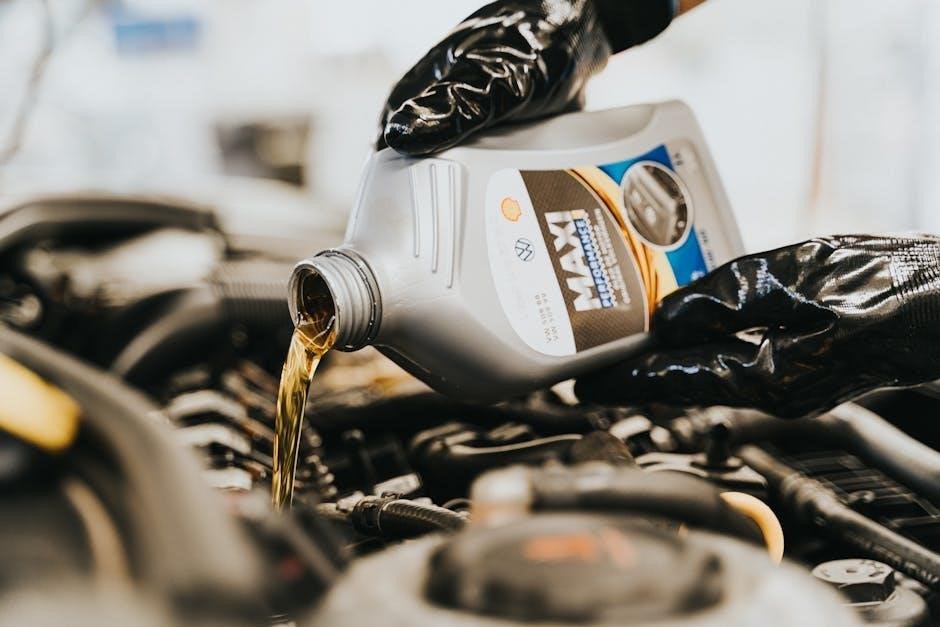
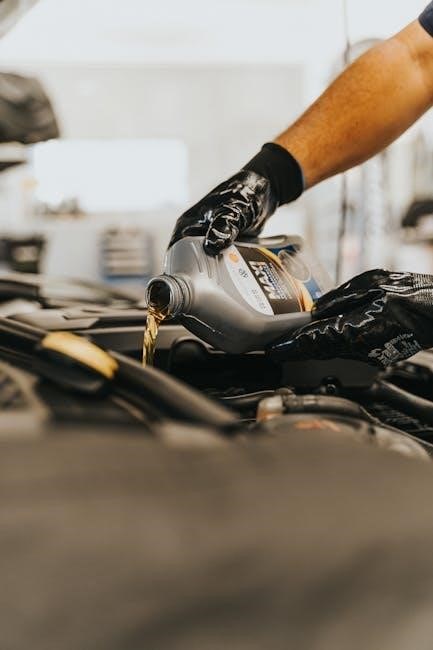
Filling with New Oil
With the drain plug securely reinstalled, locate the gearbox fill plug – often found on the side of the transmission case. Carefully remove the fill plug, preparing to add the new gearbox oil. Use a pump or funnel to slowly pour the specified amount of oil into the gearbox, referencing your vehicle’s owner’s manual for the correct capacity.
Avoid overfilling, as this can lead to pressure buildup and potential seal damage. Add the oil gradually, checking the level periodically as you go. It’s better to slightly underfill and then top up, rather than overfill initially.
Ensure you are using the correct type and specification of gearbox oil recommended by the vehicle manufacturer, as using an incorrect oil can compromise performance and longevity.
Once the correct amount of oil has been added, reinstall the fill plug and tighten it to the manufacturer’s specified torque.
Checking the Oil Level
After filling with new oil, accurately assessing the level is crucial for optimal gearbox function. Many manual transmissions have a level check plug, typically positioned on the side of the gearbox case. With the vehicle on a level surface, remove this check plug.
Oil should slowly seep out of the check plug opening if the level is correct. If no oil emerges, add a small amount more and recheck. Continue this process until oil begins to trickle out, indicating the proper fill level.
Be cautious, as the oil may be hot. If the transmission lacks a check plug, refer to your vehicle’s service manual for specific level-checking procedures, which may involve removing the fill plug and inserting a dipstick.
Reinstall the check plug securely, tightening it to the manufacturer’s specified torque to prevent leaks and maintain proper oil pressure.

Post-Change Procedures and Checks
Following the oil change, meticulously inspect for any leaks around the drain and fill plugs, then embark on a short test drive to monitor performance.
Final Inspection for Leaks
After completing the gearbox oil change and tightening both the drain and fill plugs to the manufacturer’s specified torque, a thorough inspection for leaks is paramount. Start the engine and allow the vehicle to idle for several minutes, carefully observing the area around the gearbox.
Visually check for any drips or seepage emanating from the drain plug, fill plug, or the gearbox housing itself. Utilize a flashlight to illuminate hard-to-reach areas and ensure a comprehensive assessment. Pay close attention to the threads of the plugs, as these are common leak points.
If any leaks are detected, immediately shut off the engine and re-tighten the affected plug. Avoid over-tightening, as this can strip the threads or damage the gearbox casing. If the leak persists after re-tightening, it may indicate a damaged plug or a worn sealing washer, requiring replacement. A clean, dry environment is essential for accurate leak detection.
Test Drive and Monitoring
Following the leak inspection, embark on a test drive to assess the gearbox’s performance with the new oil. Begin with gentle acceleration and shifting through all gears, listening for any unusual noises or vibrations. Pay attention to the smoothness of gear engagement and disengagement, noting any resistance or difficulty;
Gradually increase the driving intensity, including both city and highway conditions, to evaluate the oil’s performance under various loads. Continue to monitor for leaks during the test drive, periodically checking the gearbox area. Observe the shift quality – it should be noticeably smoother and quieter with fresh oil.
Over the subsequent days, routinely check the oil level to ensure it remains within the recommended range. Monitor for any changes in gearbox behavior, such as increased noise or difficulty shifting, which could indicate a potential issue. Consistent monitoring is key to confirming a successful oil change.

Disposal of Used Gearbox Oil
Used gearbox oil is a hazardous waste product and must never be disposed of improperly, such as down drains, into the ground, or with regular trash. Improper disposal contaminates the environment and poses significant health risks. Responsible disposal is crucial for environmental stewardship.
The preferred method is to take the used oil to a designated oil recycling center or auto parts store that accepts used oil. Many service stations also offer oil recycling services. Ensure the oil is contained in a sealed, leak-proof container to prevent spills during transport.
Some municipalities offer hazardous waste collection events where you can safely dispose of used oil and other automotive fluids. Always check local regulations for specific disposal guidelines. Recycling used oil conserves resources and reduces pollution, contributing to a sustainable practice.