Mohawk Laminate Flooring Installation: A Comprehensive Guide
Navigating a successful installation hinges on understanding Mohawk’s Instaform locking system and adhering to guidelines․
Proper preparation, including subfloor checks and acclimation, is crucial for longevity․
Remember the 40ft threshold rule, and explore MyMohawk for resources!
Preparation: Subfloor Inspection & Requirements
Before embarking on your Mohawk laminate flooring installation, a meticulous subfloor inspection is paramount․ Ensure the subfloor is structurally sound, clean, and completely dry․ Any existing flooring, including adhesives, must be removed․
Mohawk specifies a maximum moisture content level for the subfloor – typically 12% for concrete and 13% for wood․ Utilize a moisture meter to verify compliance․
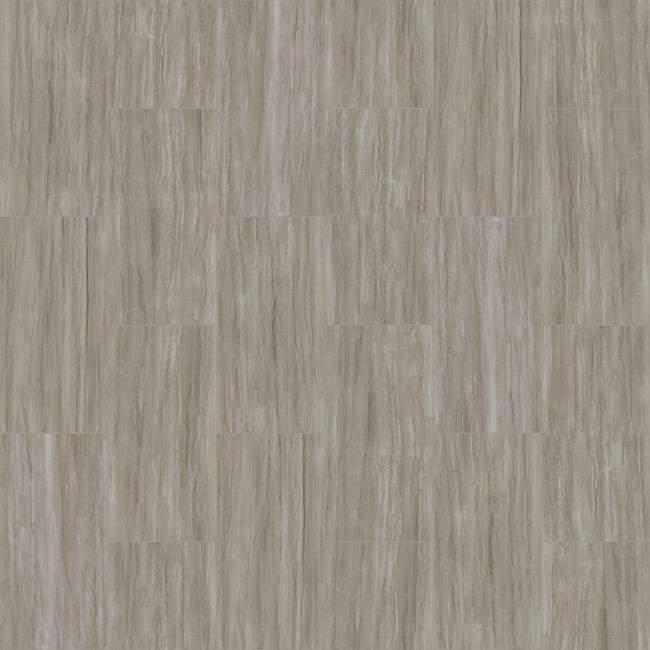
Unevenness is a critical concern; Mohawk laminate requires a flat subfloor with a maximum variation of 3/16 inch over a 10-foot span, or 1/8 inch over a 6-foot span․
Leveling compounds may be necessary to address significant imperfections․
For concrete subfloors, a moisture barrier is often required, even if moisture tests are within acceptable limits․
Wood subfloors should be securely fastened, with no loose boards or squeaks․
Addressing these preparation steps proactively will prevent future issues like gapping, buckling, or discomfort underfoot, ensuring a beautiful and durable finished floor․
Tools & Materials Checklist
Assembling the correct tools and materials beforehand streamlines your Mohawk laminate flooring installation․ Essential tools include a tapping block, pull bar, rubber mallet, measuring tape, pencil, and a laminate cutter (or a saw with a fine-tooth blade)․ Safety gear – knee pads, safety glasses, and gloves – are also crucial․
Beyond the flooring itself, you’ll need underlayment (selected based on your subfloor and Mohawk’s recommendations), transition strips for doorways and large openings, and quarter round or baseboards for finishing edges․
Don’t forget spacers to maintain the necessary expansion gap around the perimeter of the room – typically ¼ inch․ Construction adhesive may be recommended for specific applications, particularly around pipes or in high-traffic areas․
A utility knife is useful for trimming underlayment and moldings․ Having extra laminate pieces on hand for cuts and potential mistakes is always a wise precaution․ Finally, access to Mohawk’s installation guides and support resources is invaluable throughout the process․
Acclimation: Letting the Flooring Adjust
Proper acclimation is a non-negotiable step in Mohawk laminate flooring installation, preventing future issues like buckling or gapping․ Laminate needs time to adjust to the temperature and humidity of the installation environment․ This process allows the material to expand or contract naturally, minimizing movement after installation;
Generally, unopened boxes of Mohawk laminate should be stored flat in the room where they will be installed for at least 48-72 hours․ The room’s temperature should be maintained within the normal living conditions – typically between 65°F and 75°F (18°C and 24°C)․
Humidity levels should also be within the manufacturer’s recommended range, usually between 30% and 60%․ Using a humidity meter is advisable․ Avoid stacking boxes directly on concrete floors, using pallets or a moisture barrier instead․
Failing to acclimate can void your warranty, so prioritize this step․ It’s a simple precaution that significantly increases the longevity and stability of your new Mohawk laminate floor․
Underlayment Selection & Installation
Choosing the right underlayment is crucial for maximizing the performance and comfort of your Mohawk laminate floor․ While some Mohawk laminates come with pre-attached underlayment, others require a separate layer․ Consider factors like subfloor unevenness, sound reduction needs, and moisture protection when selecting․
Mohawk recommends specific underlayment products to maintain warranty validity, so consult their guidelines․ Generally, a high-quality foam or felt underlayment is suitable․ Ensure the underlayment is compatible with your laminate’s locking system․
Installation involves rolling out the underlayment perpendicular to the direction of the flooring, ensuring seams are butted tightly together and taped with moisture-resistant tape․ Avoid overlapping the underlayment, as this can create unevenness․

Trim the underlayment neatly along the walls, leaving a small expansion gap․ Proper underlayment installation provides cushioning, sound insulation, and a smoother surface for the laminate, contributing to a more comfortable and durable floor․
Planning the Layout: Direction & Staggering
Careful planning of your laminate flooring layout is essential for both aesthetics and structural integrity․ Begin by determining the direction of installation – typically parallel to the longest wall, maximizing visual space․ However, consider light sources and room features; aligning planks with light can minimize seam visibility․
Staggering the end joints is paramount․ Avoid creating a pattern where end joints line up in adjacent rows, as this weakens the floor and looks less appealing․ A minimum stagger of 6-8 inches is generally recommended, but consult Mohawk’s specific guidelines for your product․
Plan to avoid narrow planks at the edges of the room․ If necessary, adjust the starting row to ensure a more balanced appearance․ Measure the room carefully and calculate the number of planks needed for each row, accounting for waste from cuts․
Dry-lay a few rows before beginning installation to visualize the layout and make any necessary adjustments․ A well-planned layout contributes significantly to a professional-looking and durable floor․

Installing the First Row: Importance of Straightness
The first row of laminate flooring is arguably the most critical, as it establishes the foundation for the entire installation․ Absolute straightness is non-negotiable; any deviation will compound with subsequent rows, leading to visible imperfections and potential instability․
Begin by establishing a perfectly straight reference line parallel to the wall․ Use a chalk line and ensure it’s accurately positioned, accounting for the required expansion gap (typically ¼ inch) around the perimeter of the room․ This gap is vital for accommodating dimensional changes due to temperature and humidity․
Carefully align the first row of planks along the reference line, ensuring the tongue side faces the wall․ Gently press the planks together, utilizing the Mohawk Instaform locking system – gently press from one side to the other, then against the floor․
Double-check the alignment frequently with a straight edge․ A slight error in the first row can necessitate significant adjustments later, so meticulous attention to detail is crucial for a flawless result․
Locking System Mechanics: Understanding Instaform
Mohawk’s Instaform locking system is designed for a straightforward, glue-less installation, but understanding its mechanics is key to success․ This system relies on precisely engineered tongue-and-groove profiles that snap together securely, creating a floating floor․
The process involves angling the planks together at approximately a 45-degree angle before gently pressing them downwards until they click into place․ Avoid forcing the connection; a smooth, even pressure is all that’s required․ If resistance is encountered, slightly adjust the angle and try again․
Instaform’s design prioritizes a tight, seamless fit․ Ensure the planks are fully engaged – listen for the distinct click sound and visually inspect the seam to confirm a flush connection․ A properly locked joint will exhibit no gaps or unevenness․
Remember to consistently maintain a slight expansion gap around the perimeter․ The Instaform system, when correctly utilized, delivers a durable and aesthetically pleasing floor without the mess or complexity of adhesives․
Continuing Rows: Angled Insertion & Tapping Block Use
Successfully extending rows beyond the initial one demands consistent technique, primarily utilizing angled insertion and a tapping block․ Begin each new row by repeating the 45-degree angling process used for the first row, carefully aligning the tongue and groove of the planks․
Often, achieving a tight fit requires gentle persuasion․ This is where the tapping block becomes invaluable․ Position the block against the plank’s edge and use a hammer to lightly tap, ensuring even distribution of force․ Avoid direct hammering on the flooring itself, as this can cause damage․
Work across the room, staggering the end joints of each row for a more visually appealing and structurally sound installation․ Maintain the consistent expansion gap around the perimeter as you progress․ Regularly check for proper locking – listen for the click and visually inspect seams․
Remember, patience and precision are paramount․ A properly installed row lays the foundation for a flawless finished floor, so take your time and ensure each plank is securely connected․
Cutting Laminate: Techniques for Straight & Curved Cuts
Precise cuts are essential for a professional-looking laminate floor, requiring both appropriate tools and techniques for straight and curved scenarios․ For straight cuts, a laminate cutter or a circular saw with a fine-tooth blade is recommended․ Always score the surface before cutting to prevent chipping․
When using a circular saw, set the blade depth slightly less than the flooring’s thickness and use a straight edge as a guide․ For curved cuts, a jigsaw is the preferred tool․ Mark the desired curve clearly and use a slow, controlled motion to avoid splintering․
Remember to account for the blade’s width when marking your cuts․ Practice on scrap pieces first to refine your technique․ A utility knife can also be used for scoring and making clean breaks on thinner laminate․
Safety is paramount; always wear safety glasses and a dust mask during cutting․ Clean cuts contribute significantly to the overall aesthetic and structural integrity of your Mohawk laminate floor․
Around Doorways: Transition Strips & Undercutting Doors
Navigating doorways requires careful consideration to ensure a seamless and functional transition between the laminate flooring and adjacent surfaces․ Transition strips are crucial for covering expansion gaps and providing a neat finish where the flooring meets other materials like tile or carpet․
Undercutting doors allows the laminate to slide neatly underneath, eliminating the need for a transition strip in the doorway itself․ Use a jamb saw or oscillating multi-tool to carefully undercut the door casing, maintaining a slight gap for expansion․
Select transition strips that complement the flooring’s color and style․ Secure them with appropriate fasteners, ensuring they are flush with the flooring surface․ Remember the 40ft rule; longer runs may necessitate expansion gaps and transition strips․
Proper installation around doorways enhances both the aesthetic appeal and the longevity of your Mohawk laminate floor, preventing potential issues related to movement and wear․
Addressing Obstacles: Pipes, Corners & Irregularities
Encountering pipes, corners, and subfloor irregularities is common during laminate flooring installation, demanding precise techniques for a professional finish․ For pipes, carefully measure and cut a section of the laminate to fit around the pipe, leaving an expansion gap․ Utilize a hole saw for clean, circular cuts․

Corners often require intricate cuts․ Employ a jigsaw with a fine-tooth blade to create accurate angles, ensuring a snug fit against the wall․ Addressing subfloor irregularities is paramount; minor imperfections can be leveled with self-leveling compound before installation․

Larger obstacles may necessitate creative solutions, such as building a small box around them with plywood and then fitting the laminate around the box․ Always prioritize leaving sufficient expansion gaps around all obstacles to accommodate potential movement․
Careful planning and precise execution are key to overcoming these challenges, resulting in a durable and aesthetically pleasing Mohawk laminate floor․
Finishing Touches: Baseboards, Quarter Round & Shoe Molding
Completing your Mohawk laminate flooring installation requires attention to detail with finishing touches like baseboards, quarter round, and shoe molding․ These elements conceal the expansion gap around the perimeter of the room, providing a polished and professional appearance․
Baseboards are typically installed first, covering the exposed wall and providing a secure anchor․ Quarter round molding is then applied to cover the gap between the baseboard and the flooring, creating a seamless transition․ Shoe molding, a smaller profile molding, can be used as an alternative or in conjunction with quarter round․
When installing these moldings, ensure they don’t bind against the flooring, restricting its natural expansion and contraction․ Use a nail gun with appropriate nails to secure the molding to the wall studs, avoiding direct nailing into the flooring itself․
Caulk any remaining gaps between the molding and the wall or flooring for a truly finished look, enhancing the overall aesthetic and protecting the floor from moisture․

Expansion Gaps: Maintaining Flooring Integrity
Maintaining the integrity of your Mohawk laminate floor hinges on understanding and providing adequate expansion gaps․ Laminate flooring expands and contracts with changes in temperature and humidity; failing to account for this can lead to buckling or gapping․
A consistent expansion gap of approximately 1/4 to 3/8 inch should be left around the perimeter of the room, including along walls, doorways, and any fixed objects like pipes or cabinets․ This gap allows the flooring to move freely without putting stress on the locking system․
The 40ft rule is crucial: thresholds are generally required every 40 feet in a straight run to accommodate expansion and contraction․ Without thresholds, flooring can buckle over longer distances․
During installation, use spacers to maintain consistent gap widths․ Never fasten baseboards or other moldings directly to the flooring, as this will eliminate the expansion space․ Proper expansion gaps are vital for a long-lasting, trouble-free floor․
Threshold Requirements: 40ft Rule & Considerations
Mohawk laminate flooring installation often necessitates the use of thresholds, dictated primarily by the 40ft rule․ This guideline stems from the material’s natural expansion and contraction with fluctuating temperature and humidity levels․ Exceeding 40 feet in a single run without a threshold significantly increases the risk of buckling or gapping․
Thresholds act as transition points, allowing for movement without compromising the floor’s integrity․ They visually separate areas and provide a smooth transition between different flooring types or rooms․
However, some Mohawk flooring products may be installed with zero thresholds, so always consult the specific installation instructions for your chosen product․ These instructions will clearly state whether thresholds are mandatory or optional․
Consider doorways and large openings – these areas almost always require thresholds․ Proper threshold selection and installation are crucial for a professional finish and to prevent future flooring issues․ Ignoring the 40ft rule can void warranty claims․
Troubleshooting Common Installation Issues
Even with careful planning, Mohawk laminate flooring installations can encounter challenges․ A frequent issue is locking system difficulty; ensure planks are level and gently tap with a tapping block, avoiding forceful hammering which can damage the edges․ Gaps often indicate an uneven subfloor – address this before proceeding․
Buckling typically arises from insufficient expansion gaps․ Revisit the installation instructions and ensure adequate space around the perimeter of the room․ Conversely, tight spots suggest excessive expansion; assess humidity levels and consider reducing the gap slightly․
If encountering issues with the Instaform locking system, double-check the angle of insertion and ensure the planks are fully engaged․ Avoid twisting or forcing the pieces together․ For stubborn areas, a rubber mallet can provide gentle persuasion․
Remember to consult Mohawk’s official resources, including online guides and support forums, for specific solutions to common problems․ Careful diagnosis and patient correction are key to a successful outcome․
Post-Installation Care & Maintenance
Protecting your newly installed Mohawk laminate flooring is essential for its longevity and appearance․ Regular cleaning is paramount; sweep or vacuum frequently to remove dust and debris, preventing scratches․ Damp mop with a laminate-specific cleaner, avoiding excessive water which can damage the core․
Avoid using abrasive cleaners, scouring pads, or steel wool, as these can dull the finish․ Protect furniture legs with felt pads to prevent scratches during movement․ Area rugs in high-traffic zones offer additional protection and enhance the aesthetic․
Spills should be cleaned up immediately to prevent staining or warping․ While laminate is water-resistant, prolonged exposure can cause damage․ Be mindful of pet claws, keeping them trimmed to minimize scratching․
Sunlight can cause fading over time; consider using curtains or blinds to mitigate this effect․ With proper care, your Mohawk laminate floor will provide years of beauty and durability, enhancing your home’s value․