Sassy Saints brings the salon experience home‚ offering an at-home brow lamination kit for achieving 6-8 weeks of flawlessly laminated‚ fuller brows.
This innovative kit empowers users to create salon-quality results with ease‚ providing a convenient and cost-effective alternative to professional treatments.
What is Brow Lamination?
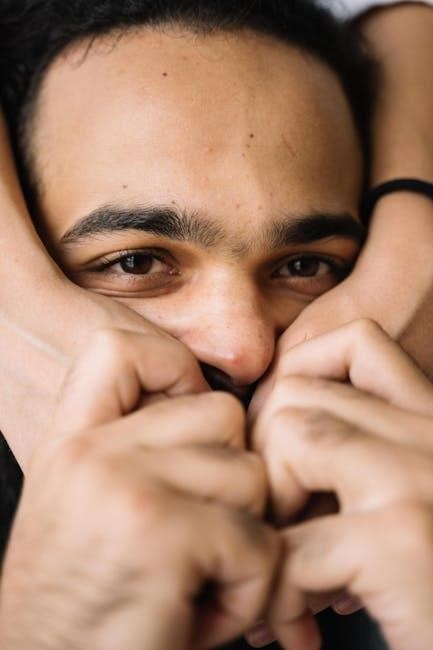
Brow lamination is a process that essentially “sets” your brow hairs in a desired shape‚ creating a fuller‚ fluffier‚ and more defined look. Unlike a perm for hair‚ brow lamination doesn’t introduce curl‚ but rather relaxes and redirects the natural hair pattern.
The Sassy Saints kit utilizes a chemical solution to break down the bonds in the brow hairs‚ allowing them to be reshaped. This results in brows that appear thicker and more voluminous‚ with each hair lifted and aligned. It’s a fantastic alternative to microblading or other semi-permanent makeup options‚ offering a temporary yet impactful transformation. The effects typically last between 6-8 weeks‚ depending on hair growth and aftercare.
Essentially‚ it’s a stylish and effective way to enhance your natural brow shape!
Benefits of Sassy Saints Brow Lamination Kit
The Sassy Saints Brow Lamination Kit offers numerous advantages‚ bringing professional brow styling to your home. Foremost‚ it’s a cost-effective solution‚ providing 6 lush brow treatments within a single kit – potentially 9-12 months of use!
You gain complete control over the process‚ customizing the shape and fullness to your exact preferences. It’s a convenient alternative to frequent salon visits‚ saving both time and money. The kit delivers salon-quality results‚ achieving beautifully laminated brows and beautifully curled lashes.
Furthermore‚ Sassy Saints provides comprehensive tutorials and support‚ making it accessible even for beginners. Enjoy effortlessly defined‚ fuller-looking brows for weeks with this user-friendly kit!
Expected Results & Duration (6-8 Weeks per Treatment)
With the Sassy Saints Brow Lamination Kit‚ anticipate achieving beautifully sculpted‚ fuller-looking brows that maintain their shape for an impressive 6-8 weeks per treatment. The lamination process essentially redirects and sets the brow hairs‚ creating a lifted and voluminous effect.
Results will vary slightly depending on your natural brow hair type and growth cycle‚ but generally‚ you can expect to enjoy low-maintenance‚ perfectly styled brows for nearly two months.
Each kit provides enough product for 6 treatments‚ potentially offering 9-12 months of consistent‚ salon-worthy results. Regular aftercare‚ as outlined in the instructions‚ is crucial for maximizing longevity and maintaining optimal brow health.

Understanding the Sassy Saints Kit Contents
Sassy Saints kits deliver everything needed for at-home lamination‚ containing 6 complete brow treatments for months of fluffy‚ salon-quality results.
List of Included Products
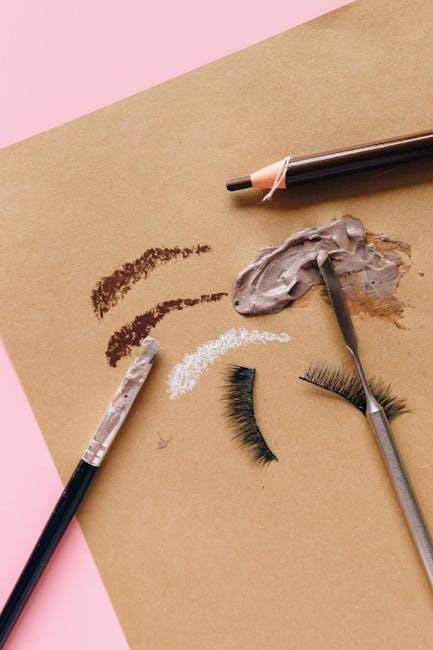
The Sassy Saints Brow Lamination Kit is comprehensively equipped to deliver professional results in the comfort of your home. Each kit meticulously includes all the necessary components for a complete brow transformation. You’ll find the Perm Lotion‚ responsible for reshaping the brow hairs‚ and the Neutralizing Lotion‚ which locks in the new shape.
Furthermore‚ the kit provides sufficient product for approximately 6 lush brow treatments‚ ensuring long-lasting benefits. Essential applicators‚ like micro brushes and spoolies‚ are also included for precise and controlled application. The kit is designed to provide a full salon experience‚ allowing you to achieve beautifully laminated brows for up to 6-8 weeks per treatment.
Tools You’ll Need (Not Included)
While the Sassy Saints Brow Lamination Kit is comprehensive‚ a few essential tools are required for a successful application and are sold separately. You will need a precise timer to accurately monitor the processing times of both the Perm and Neutralizing Lotions – timing is critical for optimal results.
Additionally‚ disposable mascara wands or micro brushes (beyond those included) are helpful for thorough product distribution. A spoolie brush is vital for lifting and shaping the brows during application. Finally‚ gentle makeup remover or a mild cleanser is needed for prepping the brows before the lamination process begins‚ ensuring a clean canvas for best adhesion.
Kit Yield: 6-12 Months of Treatments
One of the significant advantages of the Sassy Saints Brow Lamination Kit is its impressive yield. Each kit is formulated to provide approximately 6 lush brow treatments‚ offering substantial value and longevity. Considering each treatment delivers 6-8 weeks of beautifully laminated brows‚ a single kit can effectively maintain your desired brow shape for an extended period.
This translates to a potential of 9-12 months of consistently fuller‚ fluffier brows from just one purchase! This makes it a cost-effective solution compared to frequent salon visits‚ allowing you to enjoy professional-quality results in the comfort of your own home‚ whenever you need a brow refresh.
Preparation is Key: Safety First!
Prioritize safety with a mandatory patch test before your first Sassy Saints brow lamination. Careful preparation and adherence to precautions are essential for optimal results.
Performing a Patch Test
Before your initial Sassy Saints brow lamination‚ a patch test is absolutely crucial to ensure you don’t experience any adverse reactions. Apply a small amount of the Perm Lotion to a discreet area – ideally behind the ear or on the inner arm.
Leave it undisturbed for the recommended time (refer to kit instructions‚ typically around 24-48 hours). Carefully monitor the area for any signs of irritation‚ redness‚ swelling‚ or discomfort.
If any reaction occurs‚ do not proceed with the brow lamination. Discontinue use immediately and consult a healthcare professional. A successful patch test confirms your skin tolerates the formula‚ allowing you to confidently enjoy the benefits of beautifully laminated brows.
Contraindications & Precautions
Certain conditions necessitate avoiding Sassy Saints brow lamination. Do not use if you have experienced allergic reactions to similar products‚ have skin irritations or open wounds around the brow area‚ or recently undergone skin treatments like chemical peels or microdermabrasion.
Pregnant or breastfeeding individuals should also refrain from using the kit. Always ensure adequate ventilation during application. Avoid contact with eyes – if contact occurs‚ rinse immediately with plenty of water.
Keep the kit out of reach of children. Strictly adhere to the recommended processing times; over-processing can cause damage. If irritation persists‚ discontinue use and seek medical advice.
Sanitizing Your Workspace & Tools
Prioritize hygiene for a safe and effective Sassy Saints brow lamination experience. Thoroughly clean and disinfect your workspace before beginning. Use a hospital-grade disinfectant to sanitize all tools – including brushes‚ spoolies‚ mixing dishes‚ and any applicators – even if they appear clean.
Ensure tools are completely dry before use. Wear disposable gloves throughout the entire process to prevent contamination. Wipe down surfaces with disinfectant wipes. Proper sanitation minimizes the risk of infection and ensures optimal results.
Consider using disposable applicators where possible to further reduce the chance of cross-contamination. A clean environment is crucial for a successful lamination.

Step-by-Step Brow Lamination Instructions
Follow these steps carefully for optimal results with your Sassy Saints kit. Each stage‚ from cleansing to neutralizing‚ is vital for achieving beautifully laminated brows.
Step 1: Cleansing the Brows
Begin with a thorough cleanse of your eyebrows and the surrounding skin. This crucial first step removes any makeup‚ oils‚ or residue that could interfere with the lamination process. Use a gentle‚ oil-free cleanser to ensure optimal product absorption.
Saturate a cotton pad or a microbrush with the cleanser and gently wipe across your brows in upward and outward motions. Pay close attention to the base of the brows‚ where product buildup can easily occur.
Follow up with a clean‚ dry cotton pad to remove any remaining cleanser. Ensure your brows are completely dry before proceeding to the next step. A clean canvas is essential for achieving the best possible lamination results with your Sassy Saints kit.
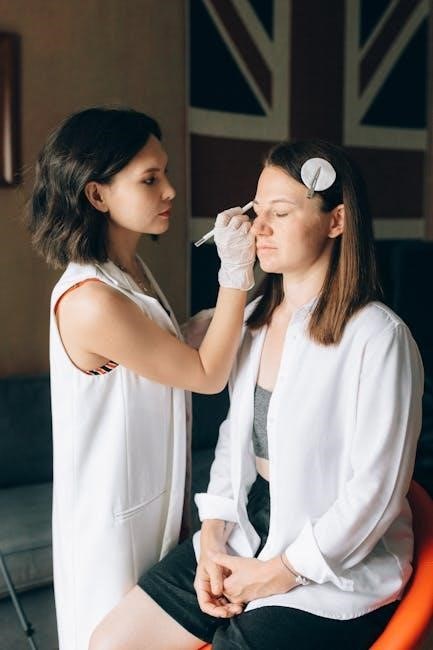
Step 2: Applying the Perm Lotion
Carefully apply the Perm Lotion to your eyebrows using a microbrush or applicator. Start at the base of the brows and work upwards‚ ensuring every hair is fully coated. Avoid getting the lotion on your skin – focus solely on the brow hairs themselves.
Gently brush the hairs into your desired shape during application. This is your opportunity to direct the hairs for the laminated look you want to achieve. Ensure even saturation for consistent results.
Be precise and avoid excessive application‚ as this can lead to over-processing. The Sassy Saints Perm Lotion is designed to reshape and set the brow hairs‚ so careful application is key.
Step 3: Timing the Perm Lotion (Critical!)
Timing is absolutely crucial when using the Sassy Saints Perm Lotion. The recommended processing time varies based on hair thickness and desired lift. Generally‚ start with 5-8 minutes for fine hair and 8-12 minutes for coarser hair.
Continuously monitor the brows during processing. Do not exceed 15 minutes under any circumstances‚ as over-processing can cause damage. Check the hair’s flexibility periodically – it should be pliable but not fragile.
Beginner tip: Start with the shorter end of the time range and check frequently. It’s always better to under-process and repeat than to over-process and risk hair breakage. Accurate timing ensures optimal results!
Step 4: Removing the Perm Lotion
Once the appropriate processing time has elapsed‚ it’s time to carefully remove the Sassy Saints Perm Lotion. Using a clean‚ dry microbrush or spoolie‚ gently wipe away the lotion from both brows.
Avoid getting the lotion in the eyes – if contact occurs‚ rinse immediately with plenty of water. Ensure all traces of the Perm Lotion are removed‚ as any residue can affect the subsequent steps.
Follow up with a damp cotton pad to thoroughly cleanse the brow area‚ removing any remaining product. Do not re-wet the brows until the Neutralizing Lotion is applied. This step prepares the brows for neutralization.
Step 5: Applying the Neutralizing Lotion
After thoroughly removing the Perm Lotion‚ it’s crucial to immediately apply the Sassy Saints Neutralizing Lotion. This step resets the bonds within the brow hairs‚ locking in the new laminated shape.
Using a clean microbrush or applicator‚ carefully coat both brows with the Neutralizing Lotion‚ ensuring every hair is fully saturated. Avoid getting the lotion in the eyes; rinse immediately with water if contact occurs.
Work quickly and efficiently to prevent any reversion of the brow shape. The Neutralizing Lotion is vital for achieving long-lasting results and maintaining the integrity of the hair.
Step 6: Timing the Neutralizing Lotion
Precise timing is paramount when using the Sassy Saints Neutralizing Lotion. Allow the lotion to process on the brows for a full 8-10 minutes. This duration is critical for effectively neutralizing the hair and securing the laminated shape.
Do not under or over process‚ as this can compromise the results. Regularly check the brows during the processing time to ensure even application and no adverse reactions.
A timer is highly recommended to maintain accuracy. Consistent timing contributes significantly to achieving optimal and long-lasting brow lamination results with the Sassy Saints kit.
Step 7: Removing the Neutralizing Lotion
After the 8-10 minute processing time‚ carefully remove the Sassy Saints Neutralizing Lotion. Use a clean‚ dry microbrush or disposable applicator to gently wipe away the product‚ ensuring all residue is eliminated from the brow hairs.
Avoid getting the lotion into the eyes. Following removal‚ thoroughly rinse the brow area with cool water to neutralize any remaining solution and soothe the skin.
Pat the brows dry with a clean‚ lint-free towel. Proper removal is essential for preventing irritation and ensuring the longevity of your newly laminated brows.
Post-Lamination Care & Maintenance
Following lamination‚ avoid water‚ makeup‚ and excessive touching for 24-48 hours to allow the brows to fully set and maintain optimal results.
24-48 Hour Guidelines
Crucially‚ the initial 24-48 hours post-lamination are vital for achieving lasting results. Avoid getting your newly laminated brows wet – this includes showering‚ swimming‚ saunas‚ and even excessive sweating from exercise. Water can disrupt the setting process and compromise the shape.
Furthermore‚ refrain from applying any makeup‚ skincare products‚ or oils directly to the brow area during this period. These products can interfere with the lamination and potentially cause irritation. Avoid touching or rubbing your brows frequently‚ as this can also disturb the newly aligned hairs.
Sleeping on your face should also be minimized. Gentle care and adherence to these guidelines will maximize the longevity and effectiveness of your Sassy Saints brow lamination treatment‚ ensuring beautifully sculpted brows for weeks to come.
Recommended Aftercare Products
To maintain your Sassy Saints brow lamination and prolong its stunning effects‚ incorporating specific aftercare products is highly recommended. A nourishing brow oil‚ applied sparingly‚ can help hydrate the hairs and keep them flexible‚ preventing breakage. Look for oils containing castor oil or argan oil.
Gentle cleansing is key; use a mild‚ sulfate-free cleanser to avoid stripping the brows of their natural oils. A spoolie brush is essential for daily brushing‚ training the hairs to stay in their newly laminated shape. Avoid harsh rubbing or excessive manipulation.
Consider a brow conditioning serum to further strengthen and nourish the hairs‚ promoting healthy growth and overall brow health. Consistent aftercare will ensure your laminated brows remain fabulous for the full 6-8 weeks!
Maximizing the Longevity of Your Lamination
Extending the life of your Sassy Saints brow lamination requires diligent aftercare and mindful habits. For the initial 24-48 hours‚ avoid water contact‚ including showering‚ swimming‚ and excessive sweating. This allows the lamination to fully set.
Daily brushing with a clean spoolie is crucial; gently train the hairs into the desired shape each morning. Avoid oil-based makeup removers or cleansers‚ as oil can break down the lamination. Limit exposure to direct sunlight and harsh weather conditions‚ which can fade the results.
Regular conditioning with a brow serum will nourish the hairs and maintain their flexibility. By following these tips‚ you can enjoy beautifully laminated brows for the full 6-8 weeks‚ or even longer!

Troubleshooting Common Issues
Sassy Saints lamination can sometimes result in unevenness‚ irritation‚ or failure to hold. Addressing these concerns requires careful review of instructions and patch testing.
Uneven Results
Achieving consistent results with Sassy Saints Brow Lamination requires meticulous application of each product. Uneven lamination often stems from inconsistent Perm Lotion coverage; ensure every hair is thoroughly saturated‚ focusing on sparse areas.
Pay close attention to timing – under-processing leads to lack of lift‚ while over-processing can cause damage. Carefully monitor the recommended processing times.
When removing the lotions‚ be gentle and thorough‚ avoiding harsh rubbing that could disrupt the newly shaped brow hairs. If unevenness persists‚ a slight reapplication of the Perm Lotion (with reduced timing) to the less affected area might help‚ but proceed with caution. Always prioritize brow health!
Irritation or Sensitivity
Prioritizing skin safety is crucial when using the Sassy Saints Brow Lamination Kit. Irritation or sensitivity can occur‚ even with a patch test‚ especially for those with sensitive skin. Immediately discontinue use if redness‚ itching‚ or burning develops.
Ensure the skin around the brows is completely clean and free of makeup or oils before application. Avoid getting the product in the eyes. If contact occurs‚ rinse thoroughly with water.
A cool compress can help soothe mild irritation. If symptoms are severe or persist‚ consult a dermatologist. Always perform a patch test 48 hours before full application to assess individual tolerance.
Lamination Not Holding
If your Sassy Saints Brow Lamination isn’t holding as expected‚ several factors could be at play. Insufficient timing with the perm lotion is a common culprit – ensure adequate processing time‚ but strictly adhere to the recommended guidelines.
Thoroughly removing all traces of each lotion is vital; residue can interfere with the lamination process. Brows that are naturally coarse or oily may require slightly longer processing times.
Proper aftercare is also key; avoid harsh products and excessive moisture for the first 24-48 hours. If issues persist‚ review the tutorial and consider repeating the process carefully.

Sassy Saints Brow Lamination: Additional Resources
Sassy Saints offers detailed tutorials and helpful customer reviews to enhance your brow lamination experience and achieve optimal results at home.
Official Sassy Saints Tutorials
Sassy Saints provides comprehensive‚ step-by-step video tutorials directly on their website‚ guiding users through each stage of the brow lamination process. These resources are designed for both beginners and those with prior experience‚ ensuring a smooth and successful application.
The tutorials cover everything from the crucial patch test and proper product application techniques to timing considerations for the perm and neutralizing lotions. They visually demonstrate how to achieve perfectly laminated and tinted brows‚ mirroring salon-quality results.
Accessing these official guides is highly recommended to maximize the kit’s potential and minimize the risk of errors. They offer valuable insights and address common questions‚ empowering you to confidently achieve your desired brow look.
Customer Reviews & Experiences
Sassy Saints brow lamination kits have garnered significant attention online‚ with numerous customers sharing their experiences and results via platforms like YouTube. Many reviewers highlight the kit’s ease of use‚ even for first-timers‚ and the impressive‚ salon-worthy outcomes achieved at home.
Common feedback emphasizes the importance of carefully following the included instructions and timing the lotions precisely. Users report achieving 6-8 weeks of beautifully laminated brows‚ praising the kit’s ability to create fuller‚ fluffier‚ and more defined arches.
Positive reviews often mention the cost-effectiveness compared to professional treatments‚ making it a popular choice for maintaining laminated brows between salon visits. However‚ some advise performing a patch test diligently to avoid potential irritation.