Ryobi 1700 PSI Pressure Washer Manual: A Comprehensive Guide
This manual details the Ryobi 1700 PSI pressure washer’s operation‚ maintenance‚ and troubleshooting. It provides instructions for safe and effective cleaning‚ covering setup to power and performance.
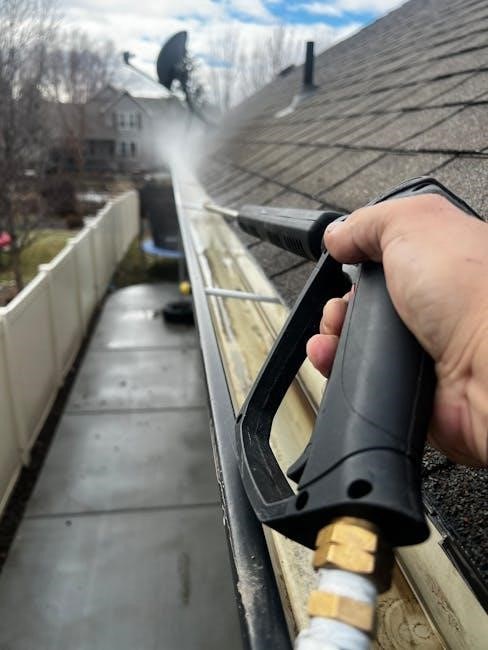
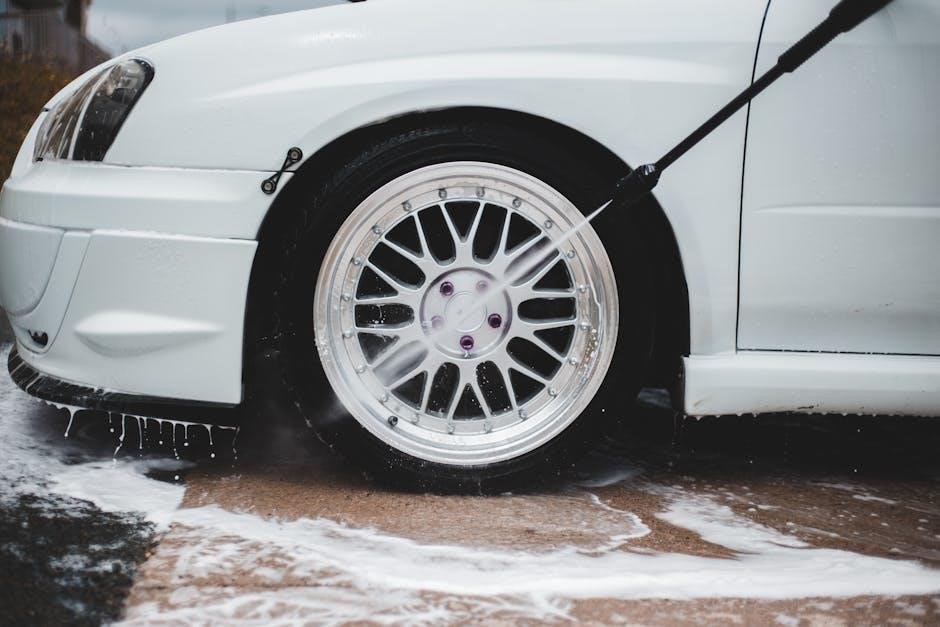
The Ryobi 1700 PSI pressure washer is a versatile cleaning tool designed for residential applications in Australia and beyond. This electric pressure washer delivers 1700 PSI of cleaning power‚ making it suitable for a wide range of tasks‚ from washing cars and siding to cleaning decks and patios.

This guide serves as a comprehensive resource for understanding and utilizing your pressure washer effectively. It’s crucial to read your owner’s manual carefully before operation to ensure safety and optimal performance. The RPW170-G model‚ and similar variants‚ are known for their reliability and ease of use.
This manual provides step-by-step instructions‚ covering everything from unboxing and assembly to operation and maintenance. Understanding the components and following the recommended procedures will maximize the lifespan of your Ryobi 1700 PSI pressure washer and ensure consistently excellent cleaning results. Accessing the PDF user manuals online can also be beneficial;
Understanding the Key Features
The Ryobi 1700 PSI pressure washer boasts several key features contributing to its effectiveness. Its 1700 PSI maximum pressure‚ coupled with a 1.4 GPM flow rate‚ provides substantial cleaning power. The electric motor offers convenient operation without the fumes of a gas engine.
Key components include the pump assembly‚ responsible for generating pressure‚ and the trigger gun‚ controlling water flow. Interchangeable nozzles allow for customized spray patterns‚ adapting to various cleaning needs. The hose and wand facilitate reaching different areas.
The machine’s design prioritizes user-friendliness‚ with easy-to-follow instructions and a relatively lightweight build for portability. The operator’s manual details nozzle selection and pressure adjustments. Understanding these features‚ as outlined in the PDF documentation‚ is vital for maximizing cleaning efficiency and extending the life of your Ryobi pressure washer.
Safety Precautions and Warnings
Prior to operating your Ryobi 1700 PSI pressure washer‚ carefully read and understand all safety rules and instructions detailed in the operator’s manual. Never operate the machine without fully comprehending its functions and potential hazards.
Always wear safety glasses to protect your eyes from debris. Avoid directing the spray at people‚ animals‚ or electrical connections. High-pressure water can cause serious injury. Ensure a stable footing during operation and never overreach.
Disconnect the power source before performing any maintenance or changing nozzles. Do not modify the pressure washer in any way. Be mindful of the surrounding environment and avoid spraying flammable materials. Refer to the manual for specific warnings regarding electrical safety and proper grounding. Ignoring these precautions can lead to severe consequences.

Setting Up Your Pressure Washer
Proper setup involves unboxing‚ assembling components‚ connecting the water supply‚ and ensuring a secure power source. Refer to the manual for detailed guidance.
Unboxing and Component Checklist
Carefully unpack your Ryobi 1700 PSI pressure washer‚ ensuring all components are present and undamaged. The box should contain the pressure washer unit itself‚ a high-pressure hose‚ a trigger gun‚ various nozzles (typically including a soap nozzle‚ a 15-degree nozzle‚ and a turbo nozzle)‚ a detergent tank‚ and this operator’s manual.
Inspect each item for any shipping damage. Verify the presence of all quick-connect fittings and the power cord. A parts diagram within the manual will aid in identification. If any parts are missing or damaged‚ immediately contact Ryobi customer support at 1-888-90WORKS (888.909.6757) for assistance.
Retain the packaging for potential future transport or warranty claims. Before proceeding‚ familiarize yourself with each component’s function as described in the manual. This initial check ensures a smooth setup process and prevents issues during operation.
Assembling the Pressure Washer
Begin assembly by attaching the high-pressure hose to the pressure washer unit and the trigger gun‚ ensuring secure connections using the quick-connect fittings. Next‚ connect the detergent tank to the designated inlet on the pressure washer. Refer to the diagrams in your manual for precise locations.
Attach the desired nozzle to the trigger gun‚ again utilizing the quick-connect mechanism. Ensure it clicks firmly into place. The wand typically attaches directly to the trigger gun. Double-check all connections for tightness before proceeding.
Carefully review the manual’s illustrations to confirm correct assembly. Improper assembly can lead to leaks or reduced performance. This Ryobi 1700 PSI model is designed for straightforward setup‚ but attention to detail is crucial for safe and effective operation.
Connecting the Water Supply
Before connecting‚ ensure your water source provides at least 20 PSI of water pressure – crucial for optimal performance of the Ryobi 1700 PSI pressure washer. Attach a standard garden hose to the water inlet on the pressure washer unit. Use a hose washer to prevent leaks‚ tightening securely by hand.
Avoid using a hose that is damaged or kinked‚ as this restricts water flow and can harm the pump. Fully open the water supply valve at the faucet. The manual emphasizes checking for leaks at the hose connection point.
Purge the hose by running the water briefly before connecting to the pressure washer‚ removing any debris. Never draw water from a stagnant source. Following these steps ensures a consistent water supply‚ maximizing cleaning efficiency and prolonging the life of your Ryobi pressure washer.
Connecting the Power Source
Prior to connecting‚ verify your electrical outlet matches the voltage requirements specified on the Ryobi 1700 PSI pressure washer’s nameplate – typically 120V‚ 60Hz. Use a heavy-duty extension cord (12 AWG or thicker) if the outlet is distant‚ ensuring it’s rated for outdoor use and is GFCI protected.
Never use a damaged or frayed extension cord. Plug the pressure washer directly into a grounded outlet‚ or the extension cord. The manual strongly advises against using adapters. Ensure the power switch is in the “OFF” position before plugging in.
Avoid operating the pressure washer in wet conditions or with damp hands. A Ground Fault Circuit Interrupter (GFCI) is essential for safety. Proper electrical connection safeguards both the user and the pressure washer‚ ensuring reliable operation and preventing potential hazards.

Operating Instructions
Follow the manual’s guidance for starting‚ stopping‚ pressure adjustments‚ and nozzle selection. Proper spraying techniques maximize cleaning efficiency and prevent damage to surfaces.
Starting and Stopping the Pressure Washer
Before starting‚ ensure all connections are secure – water supply and power source. Open the water supply fully. Connect the desired nozzle and wand. Plug the pressure washer into a grounded outlet. Turn the power switch to the “ON” position.
To start‚ squeeze the trigger on the spray gun; the unit will begin to pressurize. Release the trigger to stop water flow‚ but the motor will continue running. To completely stop‚ turn the power switch to the “OFF” position. Never release the trigger until the unit is powered off to avoid potential hose whipping.
Always disconnect the power source and water supply when not in use or performing maintenance. Refer to your owner’s manual for specific instructions related to your Ryobi 1700 PSI model‚ as procedures can vary slightly. Read all safety precautions before operation.
Adjusting Pressure Settings
Ryobi 1700 PSI pressure washers often feature adjustable pressure settings‚ allowing you to tailor the cleaning power to the task. These settings are typically controlled via quick-connect nozzles‚ each offering a different spray angle and pressure output. Lower pressure (wider angle nozzles) are ideal for delicate surfaces like painted wood or vehicles.
Higher pressure (narrower angle nozzles) are suitable for tougher jobs like concrete or heavily soiled surfaces. Experiment with different nozzles on an inconspicuous area first to determine the optimal setting. Avoid using high pressure on fragile materials‚ as it can cause damage.
Some models may include a pressure regulator dial for fine-tuning the output. Always consult your owner’s manual for specific instructions on adjusting the pressure settings for your particular Ryobi model. Prioritize safety and start with the lowest setting‚ increasing as needed.
Nozzle Selection and Usage

Ryobi 1700 PSI pressure washers utilize a quick-connect nozzle system‚ offering versatility for various cleaning applications. Common nozzle colors represent different spray angles and pressures: 0° (red) for concentrated‚ powerful cleaning; 15° (yellow) for stubborn dirt; 25° (green) for general-purpose cleaning; and 40° (white) for delicate surfaces.
Always ensure the nozzle is securely connected before operation. Begin with a wider angle nozzle (40° or 25°) and gradually decrease the angle if more cleaning power is needed. Never point a high-pressure nozzle directly at people‚ animals‚ or electrical equipment.
Soap nozzles (black) are designed for applying detergents. Refer to your manual for proper soap dilution ratios. Regularly inspect nozzles for clogs and clean them as needed. Proper nozzle selection maximizes cleaning efficiency and prevents damage to surfaces.
Proper Spraying Techniques
Effective cleaning with your Ryobi 1700 PSI pressure washer relies on consistent‚ sweeping motions. Maintain a consistent distance – typically 8-12 inches – from the surface being cleaned. Avoid holding the nozzle too close‚ which can cause damage. Overlapping each pass slightly ensures complete coverage and prevents streaking.
Start at the top and work your way down‚ allowing gravity to assist with rinsing. For stubborn stains‚ use a back-and-forth motion‚ gradually increasing pressure if necessary. Always test a small‚ inconspicuous area first to ensure compatibility with the surface material.
Remember to use the appropriate nozzle for the task. Wider angles are ideal for larger areas‚ while narrower angles target concentrated dirt. Maintain a firm grip on the wand and trigger‚ and always wear appropriate safety gear‚ including eye protection.
Maintenance and Troubleshooting
Regular maintenance ensures optimal performance. This section covers cleaning‚ storage‚ nozzle replacement‚ winterizing‚ and solutions for common issues with your Ryobi unit.
Cleaning and Storing the Pressure Washer

After each use‚ disconnect the Ryobi 1700 PSI pressure washer from both the water supply and the power source. Thoroughly flush the pump and hose by running clean water through the system for a minute or two to remove any residual detergent or debris. This prevents clogging and extends the life of the components.
Wipe down the exterior of the pressure washer with a damp cloth to remove dirt and grime. Pay particular attention to the motor housing and control panel. Ensure all connections are dry before storing. Store the pressure washer in a clean‚ dry‚ and frost-free location. Avoid storing it in direct sunlight or extreme temperatures.
Coil the high-pressure hose neatly and store it separately to prevent kinking or damage. Properly store all nozzles and accessories in a designated container. Always refer to the complete owner’s manual for detailed cleaning and storage guidelines specific to your model‚ ensuring long-lasting performance and reliability.
Replacing Nozzles
To replace a nozzle on your Ryobi 1700 PSI pressure washer‚ first ensure the unit is completely turned off and the water supply is disconnected. Allow the pressure to fully release from the system before proceeding. Locate the nozzle quick-connect fitting on the spray wand. Gently depress the locking mechanism‚ if present‚ and pull the existing nozzle straight out.
Select the appropriate replacement nozzle for your cleaning task – options include 0°‚ 15°‚ 25°‚ 40°‚ and soap nozzles. Align the new nozzle with the quick-connect fitting and firmly push it into place until it clicks or locks securely. Always verify the nozzle is properly seated before resuming operation.
Regular nozzle replacement may be necessary due to wear and tear. Inspect nozzles periodically for damage or clogging. Refer to your owner’s manual for a complete list of compatible nozzles and detailed instructions specific to your Ryobi model‚ ensuring optimal cleaning performance.
Winterizing Your Pressure Washer
Proper winterization is crucial to prevent damage to your Ryobi 1700 PSI pressure washer during freezing temperatures. Begin by disconnecting the water supply and draining all remaining water from the pump‚ hose‚ and wand. Use a pump saver kit‚ readily available‚ by connecting it to the water inlet and running the unit briefly – this draws antifreeze through the system.
Alternatively‚ you can manually pump out remaining water. Disconnect the high-pressure hose and trigger the gun to expel any residual water. Store the unit in a dry‚ frost-free location. Do not store the pressure washer where it could be exposed to freezing conditions.
Inspect the hose for cracks or damage and store it separately; Consult your owner’s manual for specific winterizing recommendations tailored to your Ryobi model‚ ensuring it’s ready for use next spring.
Common Problems and Solutions
If your Ryobi 1700 PSI pressure washer fails to start‚ check the power source and ensure the outlet is functioning. A common issue is a clogged nozzle; remove and clean it thoroughly with a pin or nozzle cleaning tool. Low pressure often indicates air in the pump – trigger the gun until a steady stream emerges.
For erratic operation‚ inspect the water supply hose for kinks or obstructions. If the unit leaks‚ tighten all connections. If the motor overheats‚ allow it to cool down before restarting. Always refer to the operator’s manual for detailed troubleshooting steps.
Remember to disconnect the power before any inspection or maintenance. If problems persist‚ contact Ryobi’s toll-free helpline for assistance. Regular maintenance‚ as outlined in the manual‚ can prevent many of these issues.

Detailed Component Breakdown
This section provides an in-depth look at the Ryobi 1700 PSI pressure washer’s parts‚ including the pump‚ motor‚ hose‚ wand‚ and trigger gun functionality.
Pump Assembly
The pump assembly is the heart of the Ryobi 1700 PSI pressure washer‚ responsible for generating the high-pressure water stream. It comprises several key components working in unison. These include the pump head‚ pistons‚ connecting rods‚ and inlet/outlet valves. The pump head houses the pistons‚ which reciprocate within cylinders to draw water and pressurize it.
Connecting rods translate the motor’s rotational motion into the pistons’ linear movement. Inlet valves regulate water flow into the pump‚ while outlet valves control the pressurized water leaving the pump. Proper pump maintenance‚ like occasional flushing‚ is crucial for longevity. Inspecting the pump for leaks or unusual noises is also recommended. The pump’s efficiency directly impacts the washer’s cleaning power‚ so maintaining its integrity is paramount. Damage to any of these components can significantly reduce performance or cause complete failure.
Regularly check for wear and tear on seals and O-rings within the pump assembly to prevent pressure loss.
Motor Specifications
The Ryobi 1700 PSI pressure washer utilizes an electric motor designed to deliver sufficient power for effective cleaning. Typically‚ these models feature a 13-amp motor‚ providing a balance between performance and energy consumption. The motor operates on standard 120V AC power‚ making it readily usable with common household outlets.
Key specifications include a motor speed of approximately 3450 RPM (revolutions per minute)‚ which translates into the necessary force to drive the pump. The motor is generally induction-based‚ known for its reliability and relatively quiet operation. It’s thermally protected to prevent overheating during extended use‚ enhancing its lifespan. The motor housing is designed to resist water ingress‚ contributing to the washer’s overall durability.
Ensure the power cord is in good condition and properly grounded before each use. Avoid operating the motor in excessively wet conditions to prevent electrical hazards.
Hose and Wand Details
The Ryobi 1700 PSI pressure washer comes equipped with a high-pressure hose‚ typically 25 feet in length‚ designed to withstand the pump’s maximum pressure. This hose is constructed from reinforced PVC material‚ ensuring flexibility and resistance to kinks or bursts during operation. It features quick-connect fittings for easy attachment to both the pump and the trigger gun.
The wand‚ often extending between 15 to 24 inches‚ is usually made of durable metal or high-impact plastic. It serves as the conduit for the pressurized water and accepts various nozzle attachments. Some models include telescoping wands for extended reach‚ simplifying cleaning of hard-to-access areas.
Inspect the hose and wand before each use for any signs of damage‚ such as cracks‚ bulges‚ or leaks. Never attempt to repair a damaged hose; replace it immediately. Ensure connections are secure to prevent water leakage and maintain optimal pressure.
Trigger Gun Functionality
The trigger gun is the central control point for operating the Ryobi 1700 PSI pressure washer. It houses the trigger mechanism‚ which activates and deactivates the water flow. A safety lock is typically incorporated to prevent accidental activation‚ enhancing user safety during operation and when changing nozzles.
The gun also features a quick-connect fitting for easy nozzle attachment and detachment. Ensure the nozzle is securely locked into place before initiating operation. Some models include adjustable pressure settings directly on the trigger gun‚ allowing for fine-tuning of the cleaning power.
Proper handling involves maintaining a firm grip and directing the spray away from yourself and others. Avoid prolonged trigger engagement to prevent overheating and potential damage to the pump. Regularly inspect the trigger mechanism for smooth operation and address any stiffness or resistance promptly.