
Yale Assure Lock 2 Programming Instructions: A Comprehensive Guide
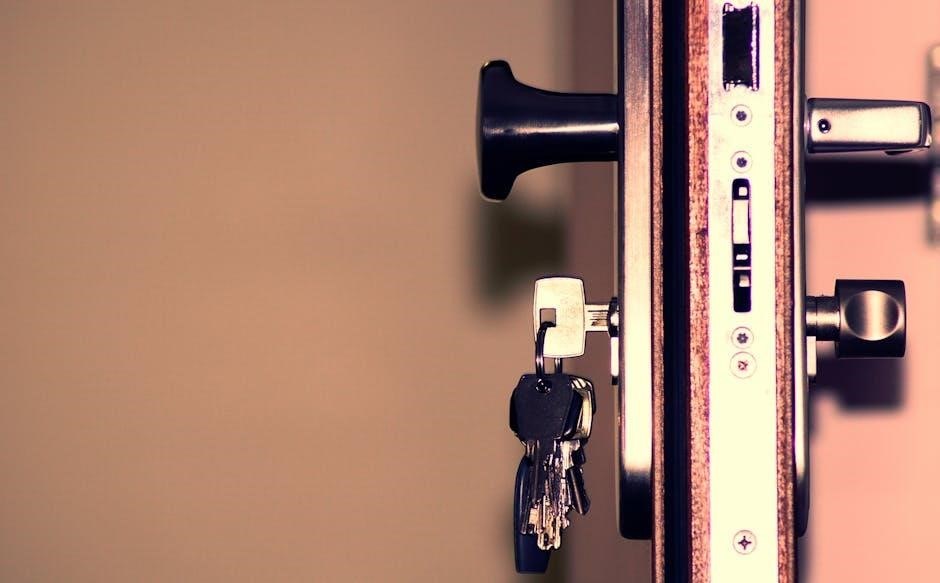
Navigating the Yale Assure Lock 2 requires careful attention to detail during installation. A common issue involves the tail piece orientation, potentially leaving keys stuck.
Initial Setup and Keypad Functionality
Beginning with the initial setup of your Yale Assure Lock 2 is crucial for seamless operation. After physically installing the lock, the first step involves connecting it to the Yale Access app via Bluetooth. This establishes the foundational link for remote control and advanced features. The app guides you through creating a master access code – a primary code for administrative functions.
Keypad functionality centers around entering these codes. The keypad itself is touch-sensitive; a gentle press activates the illumination and input. Upon entering a valid code, the lock will either retract the bolt (unlock) or extend it (lock), accompanied by audible tones – a single tone for successful locking, and potentially a tri-tone indicating an unlocked state or error.
Remember to familiarize yourself with the lock’s response to incorrect code attempts. After several failed attempts, the lock will temporarily disable keypad entry as a security measure. The app allows customization of these security settings, including the number of incorrect attempts permitted before lockout. Proper initial setup and understanding keypad responses are vital for a secure and convenient experience.
Understanding the Installation Tail Piece Orientation
A critical aspect often overlooked during Yale Assure Lock 2 installation is the correct orientation of the metal tail piece. This component, which extends from the exterior keypad through the deadbolt to the interior assembly, must be positioned precisely for proper functionality. It’s the connection point between the keypad and the locking mechanism.
The tail piece has a limited range of rotation – approximately 180 degrees in either direction. Incorrect installation, specifically a 180-degree rotation from the correct position, can lead to significant issues, such as the key becoming stuck inside the lock after unlocking. This occurs because the internal mechanism isn’t properly engaged.
During installation, ensure the tail piece is rotated counter-clockwise, or to your left, when viewed from the exterior. While the design prevents over-rotation, failing to confirm this alignment can cause frustrating problems. It’s a subtle detail, but one that can save considerable time and effort. Double-checking this orientation before fully securing the lock is highly recommended.
Common Installation Errors: The 180-Degree Tail Piece Issue
One of the most frequently reported installation errors with the Yale Assure Lock 2 centers around the 180-degree rotation of the interior tail piece. Despite the exterior keypad appearing correctly aligned with the deadbolt, an incorrect tail piece orientation can render the lock functionally impaired, creating a security risk.
This error manifests as the key remaining stuck within the lock after unlocking the door. Essentially, the unlocking action doesn’t fully disengage the mechanism, leaving the key trapped. Attempts to re-hand the lock, either manually or via the mobile app, often fail to resolve this issue, leading to user frustration.
The root cause is a simple misalignment. The metal tail piece, connecting the keypad to the internal components, must be rotated counter-clockwise. The manual often omits this crucial detail. Correcting this requires disassembling the lock and ensuring the tail piece is properly oriented. It’s a surprisingly common mistake with a straightforward fix, but one that demands attention during setup.
Troubleshooting: Key Stuck Inside the Lock
Encountering a key stuck inside your Yale Assure Lock 2 is a concerning issue, often stemming from an incorrect installation. Before assuming a mechanical failure, systematically troubleshoot the problem. First, verify the door is fully closed; the lock may not disengage properly if the door isn’t aligned.
If the door is correctly positioned, the primary suspect is the tail piece orientation, as detailed in the installation error section. Disassemble the lock and confirm the tail piece is rotated 180 degrees counter-clockwise. A misaligned tail piece prevents complete unlocking, trapping the key.
If the tail piece is correctly oriented, attempt a manual reset of the lock. Consult the Yale Access app or the user manual for specific reset instructions. If these steps fail, contacting Yale support is recommended. They can provide tailored guidance and determine if a component replacement is necessary, ensuring your home’s security isn’t compromised;
Yale Assure 2: Battery Replacement
Maintaining optimal performance of your Yale Assure Lock 2 hinges on timely battery replacement. The lock utilizes standard AA batteries, typically requiring a change after approximately one month of use, though this varies based on usage frequency and environmental factors. Low battery warnings will alert you when power is dwindling.
To replace the batteries, locate the battery compartment on the interior side of the lock. Remove the interior portion of the lock by unscrewing the mounting screws. Carefully disconnect the battery pack and insert four fresh AA batteries, ensuring correct polarity (+/-). Reconnect the battery pack and reattach the interior lock assembly.
Upon reinstallation, the lock will likely require reprogramming or re-pairing with the Yale Access app. Follow the on-screen prompts to restore functionality. It’s advisable to keep a spare set of batteries readily available to avoid unexpected lockouts and maintain consistent security.
Low Battery Warnings and Behavior
The Yale Assure Lock 2 provides multiple warnings when battery power is low, preventing unexpected lockouts. Initially, a low battery warning will appear within the Yale Access app, prompting you to replace the batteries soon. As power diminishes further, the lock will emit a low battery beep each time it’s locked or unlocked.
Critically, the lock transitions to a “critical battery” state, indicated by a rapid, repeating beep and a flashing red light on the keypad. In this state, the lock may soon cease to function. Despite the low power, the lock will typically allow several more operations before complete shutdown.
Interestingly, even with depleted batteries, the lock should still respond to the keypad code or physical key, allowing manual entry; However, remote access via the app will be unavailable. Replacing the batteries promptly is crucial to maintain all features and security functionalities of your Yale Assure Lock 2.
Door Sense Technology Explained
Yale’s Door Sense technology is a key feature of the Assure Lock 2, designed to confirm whether your door is fully closed and latched before the lock engages. This prevents the lock from attempting to secure an unlatched door, enhancing security and avoiding potential false alarms.
The system utilizes a sensor that detects the position of the door’s strike plate. If the door isn’t completely closed, the lock will not automatically engage, even if you’ve set the autolock feature. Instead, it will wait until the door is properly closed before initiating the locking process.
When Door Sense is active, the lock will typically emit a single tone to confirm successful locking after the door is closed. If the door isn’t fully closed, the lock may produce a different tone or no tone at all, indicating it’s waiting for proper latching. This feature is configurable within the Yale Access app, allowing you to adjust the delay before autolocking.
Autolock Feature Configuration
The Autolock feature on the Yale Assure Lock 2 provides enhanced security by automatically locking your door after a specified period. This eliminates the worry of accidentally leaving your home unlocked. Configuration is primarily managed through the Yale Access app, offering customizable settings to suit your lifestyle.
Within the app, you can enable or disable Autolock and set the desired delay time – ranging from 10 seconds to several minutes. A shorter delay provides quicker security, while a longer delay offers more convenience. Remember that Door Sense must be functioning correctly for Autolock to operate reliably; the door must be fully closed and latched.
If Autolock fails, it’s crucial to investigate potential causes, such as Door Sense issues or low battery levels. The lock will typically provide audible cues – a single tone for successful locking, and potentially a tri-tone if the door isn’t properly secured. Regularly testing the Autolock function is recommended to ensure consistent performance.
Troubleshooting Autolock Failure
When the Autolock feature on your Yale Assure Lock 2 isn’t functioning as expected, several factors could be at play. The most common culprit is often related to the Door Sense technology; ensure the door is fully closed and the latch is engaging correctly. A misaligned door or obstruction can prevent proper detection.
Low battery levels can also interfere with Autolock functionality. Replace the batteries with fresh ones to rule out power-related issues. Additionally, verify the Autolock setting within the Yale Access app – it may have been accidentally disabled. Listen carefully for the lock’s audible cues; a tri-tone indicates the door remains unlocked, suggesting a Door Sense problem.
If the motor attempts to lock but fails, and you hear a tri-tone, double-check for obstructions in the deadbolt path. If problems persist, consult the Yale support documentation or contact their customer service for further assistance. A temporary glitch might require a lock reset.
The Single Tone vs. Tri-Tone Lock Indicators
Understanding the auditory feedback from your Yale Assure Lock 2 is crucial for confirming successful operation. A single tone signifies that the lock has successfully engaged, securing your door. This indicates the Door Sense technology has detected a fully closed and latched door, and the Autolock feature (if enabled) has functioned correctly.
Conversely, a tri-tone serves as an alert that the door remains unlocked. This often points to an issue with Door Sense – the lock hasn’t registered the door as fully closed. It could also mean an obstruction is preventing the deadbolt from fully extending. When a tri-tone sounds after attempting to lock via the keypad or app, investigate immediately.
Pay close attention to these sounds, as they provide valuable insight into the lock’s status. Ignoring a tri-tone could compromise your home’s security. Regularly testing the lock and listening for the correct tone will ensure peace of mind.
Using the Yale Access App
The Yale Access app is central to managing your Yale Assure Lock 2, offering remote control and extensive customization. Download it from your app store and create an account, then follow the in-app instructions to connect your lock via Bluetooth or Wi-Fi (with a compatible connect module).
Once connected, the app allows you to lock and unlock your door remotely, monitor activity, and receive notifications. You can also manage user access, creating unique access codes for family, friends, or service providers. The app simplifies re-handing the lock, eliminating the need for physical adjustments.
Explore the app’s settings to configure Autolock timers, adjust volume levels, and view lock history. Firmware updates are also delivered through the app, ensuring your lock benefits from the latest features and security enhancements. Regularly check for updates to maintain optimal performance.
Adding Users and Access Codes
The Yale Access app streamlines user management for your Yale Assure Lock 2. From the app’s dashboard, navigate to the “Users” section to add new individuals with personalized access. You can assign unique PIN codes, each with customizable schedules and durations.
Temporary codes are ideal for guests or service providers, granting access for a limited time. Set an expiration date and time to automatically disable the code, enhancing security. The app also allows you to revoke access instantly if needed. For frequent users, create permanent codes with ongoing access.
Consider the convenience of assigning different access levels. Some users might require full access, while others may only need entry during specific hours. The app’s granular control ensures your home remains secure while accommodating various needs. Regularly review user access to maintain optimal security.

Remote Access and Control

The Yale Access app unlocks a world of remote control for your Yale Assure Lock 2. Once connected to your home’s Wi-Fi network via the Yale Connect bridge (sold separately), you can lock and unlock your door from anywhere with an internet connection.
Real-time notifications keep you informed of lock activity. Receive alerts when the door is locked or unlocked, providing peace of mind whether you’re at work or on vacation. The app also logs a detailed history of access events, allowing you to monitor who enters and exits your home.
Remote access extends beyond simple locking and unlocking. You can grant access to guests remotely, even when you’re not home; This feature is particularly useful for deliveries or unexpected visitors. Ensure your Yale Connect bridge is securely connected to your Wi-Fi for reliable remote functionality.

Re-handing the Lock (Manual and App Methods)
The Yale Assure Lock 2 offers flexibility with its re-handing capability, accommodating both left-handed and right-handed doors. If the initial installation doesn’t align with your door’s swing, you can adjust the lock’s orientation.
Manual re-handing involves disassembling the interior portion of the lock and physically rotating the latch. Ensure the tail piece is rotated 180 degrees counter-clockwise, as incorrect positioning can cause issues like keys getting stuck. The manual provides diagrams to guide this process.

Alternatively, the Yale Access app offers a convenient re-handing option. Navigate to the lock settings within the app and select the “Re-hand Lock” feature. The app will guide you through a series of steps, potentially requiring a lock reset. Both methods achieve the same result, adapting the lock to your door’s configuration.
Factory Resetting the Yale Assure Lock 2
A factory reset of your Yale Assure Lock 2 returns it to its original, out-of-the-box settings, erasing all user codes, access history, and network connections. This is useful for troubleshooting persistent issues or preparing the lock for a new owner.
The process typically involves a specific sequence of button presses on the interior keypad. Consult your Yale Assure Lock 2 manual for the exact steps, as they can vary slightly depending on the model. Be aware that a factory reset will require you to re-pair the lock with the Yale Access app and re-establish all user access codes.
Before resetting, ensure you have the necessary credentials to re-add the lock to your network and app. A reset effectively disconnects the lock, requiring a fresh setup. This is a drastic measure, so attempt other troubleshooting steps first, but it can resolve complex software glitches.
Programming Master Codes
Master codes in the Yale Assure Lock 2 provide a higher level of access and control, often used for administrative purposes. These codes can unlock the door and also allow for modifications to the lock’s settings, user access, and programming parameters.
To program a master code, you’ll generally use the interior keypad and follow a specific sequence outlined in your lock’s manual. This typically involves entering a pre-defined code (often the default setup code) followed by the new master code you wish to assign. Confirm the code to finalize the process.
It’s crucial to choose a master code that is not easily guessable and is different from other user codes. Regularly changing the master code enhances security. Remember to document your master code securely, as forgetting it can necessitate a factory reset of the entire lock system.
Temporary Access Codes
Temporary access codes are a fantastic feature of the Yale Assure Lock 2, offering convenient, time-limited entry for guests, service providers, or anyone needing short-term access to your home. These codes automatically expire after a pre-set duration, enhancing security by eliminating the need to permanently grant access.
Programming a temporary code is usually done through the Yale Access app. You specify the start and end dates/times for the code’s validity. The app guides you through the process, ensuring accurate configuration. You can create multiple temporary codes, each with unique schedules.

Consider the duration carefully when setting a temporary code. For a cleaning service, a few hours on a specific day might suffice. For a visiting friend, a code valid for their entire stay is appropriate. Regularly review and delete expired temporary codes to maintain optimal security and prevent unauthorized entry.
Troubleshooting Connectivity Issues
Connectivity problems with your Yale Assure Lock 2 can disrupt remote access and app functionality. Initial troubleshooting involves verifying your Wi-Fi network is stable and functioning correctly. Ensure the lock is within range of your Wi-Fi router; signal strength can be a significant factor.
Restarting both your Wi-Fi router and the Yale Assure Lock 2 can often resolve temporary glitches. To restart the lock, remove and reinsert the batteries. Within the Yale Access app, check for available firmware updates, as these frequently include connectivity improvements.
If issues persist, try re-pairing the lock with the app. Delete the lock from the app and then follow the setup instructions to add it again. Confirm your Yale account credentials are correct. If you continue experiencing difficulties, consult Yale’s support resources or contact their customer service for further assistance.
Firmware Updates and Maintenance
Regular firmware updates are crucial for maintaining optimal performance and security of your Yale Assure Lock 2. These updates often include bug fixes, enhanced features, and improved connectivity. The Yale Access app will typically notify you when an update is available.
Before initiating an update, ensure the lock has sufficient battery power – a low battery can interrupt the process. The update process itself should not be interrupted; avoid disconnecting power or closing the app mid-update. Allow the lock to complete the update fully, which may take several minutes.
Beyond firmware, periodic maintenance includes checking and cleaning the keypad to ensure responsive touch functionality. Inspect the door alignment and strike plate to guarantee smooth locking and unlocking. Regularly test all access codes and user settings to confirm they are functioning as expected.
Understanding Error Codes
The Yale Assure Lock 2 utilizes a series of audible tones and, within the Yale Access app, specific error codes to communicate issues. A single tone generally indicates successful operation, while a tri-tone often signals an unlocked state or an error condition.
Specific error codes displayed in the app provide more detailed information. For example, a communication error might indicate a connectivity problem with your Wi-Fi network or the Yale Access bridge. A mechanical error could suggest an issue with the lock’s internal mechanisms, potentially requiring professional service.
Consult the Yale website or the Yale Access app’s help section for a comprehensive list of error codes and their corresponding solutions. Documenting the error code and the circumstances surrounding its appearance can be helpful when contacting Yale support for assistance. Ignoring error codes can lead to further complications or security vulnerabilities.
Yale Support Contact Information
For dedicated assistance with your Yale Assure Lock 2, several support channels are readily available. The primary method is contacting Yale Customer Service directly via phone. Their toll-free number is prominently displayed on the Yale Home website, typically within the support or contact us section.
Alternatively, Yale offers extensive online support resources. Their website features a detailed FAQ section, troubleshooting guides, and downloadable manuals. The Yale Access app also includes a help center with articles and videos addressing common issues.

For more complex problems or warranty claims, submitting a support request through the Yale website is recommended. This allows for detailed documentation of the issue and facilitates a more efficient resolution process. Be prepared to provide your lock’s model number and serial number when contacting support. Expect potential wait times during peak hours.
Advanced Settings and Customization
Beyond basic functionality, the Yale Assure Lock 2 offers a range of advanced settings accessible through the Yale Access app. Users can fine-tune the autolock duration, selecting intervals from 30 seconds to several minutes, or disable it entirely. Customizing notification preferences allows tailored alerts for door activity.
The lock’s sensitivity to door closure can be adjusted using the Door Sense calibration feature, ensuring reliable locking even with slight misalignments. Volume control lets you modify the audible feedback tones, including the single or tri-tone lock indicators.

For enhanced security, explore the advanced user management options. You can create unique schedules for access codes, restricting entry to specific days and times. Furthermore, the lock supports integration with various smart home platforms, enabling voice control and automation routines. Regularly checking for firmware updates ensures optimal performance and access to the latest features.