Craftsman Snowblower User Manual: A Comprehensive Guide
This manual provides essential guidance for operating and maintaining your Craftsman snowblower, ensuring safe and efficient snow removal for years to come․
Congratulations on selecting a Craftsman snowblower! This machine is engineered for powerful and reliable snow removal, designed to tackle winter’s toughest conditions․ Before operation, carefully review this manual to understand its features, safety precautions, and maintenance requirements․ Familiarize yourself with all controls and components․
Proper use will ensure optimal performance and longevity․ Remember, consistent maintenance, like checking fluid levels and shear pins, is crucial for a hassle-free winter season․ Enjoy the power and convenience of your new Craftsman snowblower!
Safety Precautions & Warnings
Prioritize safety during snowblower operation! Always wear appropriate clothing, including eye protection and sturdy footwear․ Never operate the machine indoors or in enclosed areas due to carbon monoxide risk․ Keep children and pets away from the operating area․
Before starting, inspect the area for obstacles․ Never put hands or feet near moving parts․ Disconnect the spark plug before performing maintenance․ Follow all warnings and instructions in this manual to prevent injury․
Understanding Snowblower Components
Familiarize yourself with your Craftsman snowblower’s key parts․ This includes the auger, responsible for collecting snow, and the impeller, which powerfully throws it through the discharge chute․ The drive system provides movement, while the engine powers all functions․
Understanding these components – and their interaction – is crucial for safe operation, effective maintenance, and troubleshooting any potential issues that may arise during use․
Auger System Explained
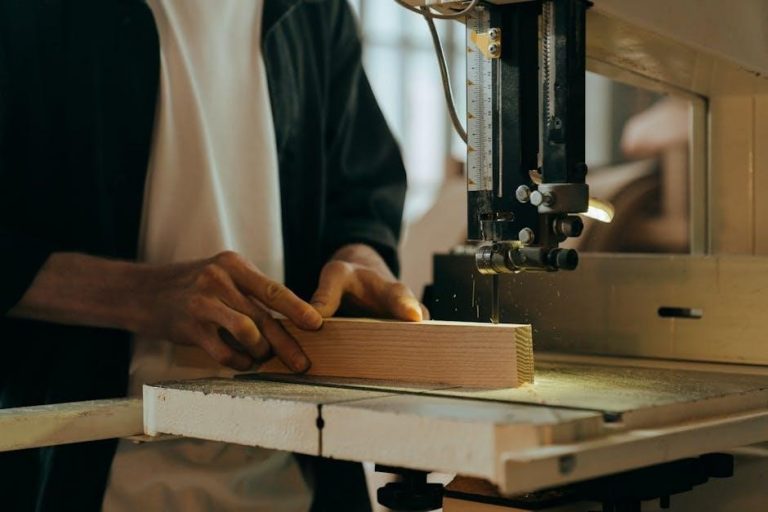
The auger is the heart of snow collection․ Composed of rotating spiral blades, it breaks up and gathers snow, feeding it towards the impeller․ Craftsman snowblowers utilize various auger designs, including single-stage and two-stage systems, impacting performance in different snow conditions․
Regular inspection for wear and proper shear bolt function are vital for safe and efficient operation of the auger system․
Impeller & Discharge Chute Details
The impeller, a high-speed fan, receives snow from the auger and powerfully ejects it through the discharge chute․ Craftsman snowblowers feature adjustable chutes, allowing you to control the throwing distance and direction of the snow․
Maintaining a clear chute and ensuring proper impeller function are crucial for optimal snow removal performance and preventing clogs․
Drive System Overview
Craftsman snowblowers utilize robust drive systems, typically featuring multiple forward and reverse speeds, enhancing maneuverability in diverse snow conditions․ These systems employ belts to transfer power from the engine to the wheels, providing traction and control․
Understanding the drive engagement lever and speed selection is vital for efficient operation and navigating challenging terrains․

Pre-Operation Checklist
Before each use, a thorough pre-operation check is crucial for safe and effective snow removal․ This includes verifying adequate fuel and oil levels, ensuring proper tire inflation for optimal traction, and confirming the skid shoes are correctly adjusted to prevent damage․
Familiarize yourself with all control levers before starting the engine․

Fueling & Oil Checks
Always use fresh, clean gasoline with the octane rating recommended in your engine specifications․ Before fueling, ensure the engine is cool and the snowblower is on a level surface․ Check the oil level using the dipstick, adding oil as needed to maintain the proper level․
Regular oil checks are vital for engine longevity․
Tire Pressure & Skid Adjustment
Maintaining correct tire pressure is crucial for optimal snowblower performance and maneuverability․ Refer to the tire sidewall for the recommended PSI and inflate accordingly․ Adjust the skid shoes to control the snow intake height, preventing damage to surfaces․
Proper adjustment ensures efficient snow clearing․
Control Lever Familiarization
Before operation, thoroughly familiarize yourself with all control levers․ Identify the levers for speed selection, auger engagement, chute control, and drive operation․ Understand their full range of motion and locking mechanisms․
Correct lever usage ensures precise control and safe snow removal, preventing accidental engagement or disengagement․
Starting Your Craftsman Snowblower
Proper starting procedures are crucial for reliable operation․ Ensure the fuel valve is open and the choke is engaged for cold starts․ Follow the recommended priming procedure – typically 3-5 pumps – before attempting ignition․ For warm starts, reduce or eliminate priming․
Always maintain a firm grip and be prepared for recoil․
Cold Start Procedure

When temperatures are below freezing, a specific cold start sequence is required․ First, ensure the fuel shut-off valve is open․ Engage the choke fully to enrich the fuel mixture․ Prime the engine by pressing the primer bulb 3-5 times․ Firmly grasp the starter rope handle and pull with a smooth, controlled motion․
Repeat if necessary, disengaging and re-engaging the choke if it doesn’t start․
Warm Start Procedure
Starting a warm engine differs from a cold start․ Initially, verify the fuel shut-off valve is open․ The choke should generally not be engaged for a warm start, or only partially․ Gently pull the starter rope; warm engines typically require less force․ If it doesn’t start immediately, try a brief choke engagement, then retry without it․
Avoid excessive priming to prevent flooding․
Troubleshooting Starting Issues

If your Craftsman snowblower fails to start, first check the fuel level and ensure the fuel shut-off valve is open․ Verify the spark plug is clean and properly connected․ A flooded engine requires no further priming; instead, pull the starter rope repeatedly with the choke disengaged․
Old fuel can also cause issues; consider draining and replacing it․
Operating Instructions
To operate your Craftsman snowblower effectively, begin by ensuring the area is clear of obstacles․ Adjust the discharge chute to direct snow away from walkways and structures․ Utilize the control levers to engage the auger and drive system, starting with a lower speed for control․
Navigate snow drifts strategically, overlapping passes for complete clearing․
Adjusting Throwing Distance & Direction
The throwing distance is primarily controlled by the speed of the impeller and the snow’s density․ Increase the auger speed for greater distance, but avoid overloading․ To adjust direction, use the chute rotation crank; a smooth, continuous motion provides precise aiming․
Ensure the chute is securely locked after adjustment to prevent unwanted redirection during operation․
Navigating Different Snow Conditions
For light, fluffy snow, a higher speed setting is efficient․ Dense, wet snow requires a slower speed to prevent clogging; engage the shear pins if resistance becomes excessive․ Icy patches demand caution – reduce speed and avoid abrupt turns․
Deep snow may necessitate multiple passes, overlapping each to clear effectively․ Regularly check the auger for buildup․
Using the Headlight Feature
The headlight enhances visibility during low-light conditions, crucial for early morning or evening snow removal; Activate the headlight using the designated switch on the control panel before starting operation․ Ensure the lens is clean for optimal brightness․
Regularly inspect the bulb and replace if necessary․ Be mindful of reflected light off the snow, and adjust accordingly․
Maintenance & Service
Regular maintenance is vital for optimal performance and longevity of your Craftsman snowblower․ Adhere to the recommended schedule for oil changes, shear bolt replacements, and general inspections․ Prioritize auger maintenance to prevent clogging and ensure efficient snow clearing․
Keep all components clean and lubricated, addressing issues promptly to avoid costly repairs․
Regular Maintenance Schedule
To ensure peak performance, follow this schedule: Before each use, check oil levels and tire pressure․ After every 20 hours of operation, inspect the auger shear bolts and replace if necessary․ Annually, change the engine oil, sharpen the scraper bar, and lubricate all moving parts․
Regular checks prevent breakdowns and extend the snowblower’s life․
Auger Shear Bolt Replacement
Shear bolts protect the auger and gearbox from damage․ When a solid object jams the auger, the bolt breaks instead of causing costly repairs․ To replace, disconnect the spark plug! Remove the damaged bolt using a wrench, then install a new one of the correct size and torque specification․
Always keep spare shear bolts on hand․
Oil Change Procedure
Regular oil changes are crucial for engine longevity․ First, warm the engine slightly for easier draining․ Locate the oil drain plug and position a suitable container underneath․ Remove the plug, allowing the old oil to drain completely․ Replace the plug, then add the recommended oil type and quantity, checking the dipstick․
Dispose of used oil responsibly․
Storage & Off-Season Care
Proper storage protects your snowblower during warmer months․ Begin by stabilizing the fuel or draining it completely to prevent carburetor issues․ Thoroughly clean the machine, removing all snow and debris․ Apply a protective coating to metal surfaces to prevent rust․ Store in a dry, sheltered location, covered to shield from dust and the elements․
Fuel Stabilization & Drain Procedures
To prevent fuel degradation during storage, use a fuel stabilizer․ Add stabilizer to a full tank, run the engine briefly to circulate it․ Alternatively, completely drain the fuel tank; this requires loosening a drain plug and safely collecting the gasoline․ Dispose of old fuel responsibly․ A drained and dry fuel system ensures easier starting next season․
Cleaning & Protecting the Snowblower
Thorough cleaning is vital before storage․ Remove all snow and ice buildup from the auger, impeller, and chassis․ Apply a corrosion protectant to metal surfaces to prevent rust․ Cover the snowblower with a breathable tarp to shield it from dust and moisture․ Store indoors, if possible, to maximize protection against the elements․
Proper Storage Location
Select a dry, sheltered location for off-season storage․ A garage, shed, or covered patio is ideal․ Avoid damp areas to prevent rust and corrosion․ Ensure the location is protected from direct sunlight and extreme temperatures․ Disconnect the spark plug wire for added safety․ Consider a location with adequate ventilation, especially after fuel stabilization․
Troubleshooting Common Problems
Addressing issues promptly extends your snowblower’s life․ A clogged auger often results from heavy, wet snow; disconnect the power before clearing it․ Drive system problems may indicate a worn belt or shear pins․ Engine failures could stem from stale fuel or a faulty spark plug․ Always consult the full manual before attempting repairs․
Clogged Auger & Chute
A frequent issue, especially with wet snow, is auger and chute blockage․ Always disconnect the spark plug wire before attempting to clear any obstructions․ Use a sturdy, non-metallic tool to remove packed snow and ice․ Avoid excessive force to prevent damage․ Regularly inspect and clear the chute to maintain optimal throwing performance․
Drive System Issues
If the snowblower isn’t moving, check the drive belt for wear or breakage․ Ensure the drive lever is fully engaged․ Inspect the shear pins – a common failure point under stress․ Low tire pressure can also hinder drive performance․ Verify the transmission fluid level if equipped, and address any leaks promptly to avoid further damage․
Engine Problems
If the engine won’t start, verify fuel levels and check the spark plug for fouling․ A clogged air filter restricts airflow, hindering performance․ Examine the recoil starter for damage․ If it starts but runs poorly, suspect carburetor issues or stale fuel․ Always disconnect the spark plug wire before performing any engine maintenance for safety․
Understanding the Control Panel
The control panel houses essential levers and switches for snowblower operation․ The drive control lever manages forward and reverse speeds, while the auger engagement lever activates the clearing mechanism․ A chute control adjusts throwing direction․ Familiarize yourself with each function before use, ensuring safe and precise snow removal․ Refer to diagrams for specific model layouts․
Lever Functions Explained
The drive control lever dictates the snowblower’s speed and direction․ Positions typically include forward speeds, reverse, and neutral․ The auger lever engages or disengages the rotating auger, crucial for snow intake․ The chute control lever adjusts the discharge direction, allowing targeted snow placement․ Always disengage levers before adjustments or maintenance for safety․
Button & Switch Descriptions
The power button initiates the engine, while the electric start switch offers convenient starting in cold weather․ The headlight switch activates illumination for low-light conditions․ Some models feature a shear pin reset button, simplifying auger protection maintenance․ Ensure all switches are in the ‘off’ position before performing any service or adjustments for optimal safety․
Belt Replacement Guide
Replacing worn belts restores optimal snowblower performance․ Disconnect the spark plug before starting․ Access the belt covers, noting the routing for reinstallation․ Remove the old belt, inspect pulleys for damage, and install the new belt, ensuring proper tension․ Verify engagement and disengagement before reassembling covers․ Regular belt checks prevent unexpected failures during operation․
Drive Belt Replacement
The drive belt transmits power to the wheels․ Begin by disengaging the drive system and disconnecting the spark plug․ Remove the belt cover, carefully noting the belt’s path around the pulleys․ Release tension and remove the old belt․ Install the new belt, ensuring it’s seated correctly in all pulley grooves, and restore tension․ Reattach the cover․
Auger Belt Replacement

The auger belt powers the snow-moving auger․ Disconnect the spark plug and ensure the machine is off․ Access the auger belt by removing the appropriate cover plates․ Release the tension on the existing belt and carefully remove it․ Install the new auger belt, verifying proper alignment within the pulley system․ Re-tension and reassemble the covers securely․
Scraper Bar Adjustment & Replacement
The scraper bar ensures close contact with the surface for efficient snow pickup․ Periodically check for wear and adjust the height using the adjustment mechanism․ A worn scraper bar reduces clearing effectiveness․ To replace, detach the old bar, noting its orientation․ Install the new scraper bar, ensuring secure attachment․ Proper adjustment minimizes snow left behind and protects surfaces;
Shear Pins & Their Importance
Shear pins are safety devices designed to protect the auger and impeller from damage․ When encountering a solid object, they break, preventing costly repairs․ Always replace a broken shear pin with an identical one – never use bolts! Regularly inspect and keep spares on hand․ Ignoring this can lead to severe engine or auger damage, voiding your warranty․
Winterizing Your Snowblower
Proper winterization ensures your Craftsman snowblower is ready for the next snowfall․ Begin by stabilizing the fuel or draining it completely to prevent gumming․ Clean the exterior thoroughly, removing all snow and ice buildup․ Apply a protective coating to metal parts․ Store in a dry location, covered, to shield from the elements and prolong its lifespan․
Warranty Information & Support
Your Craftsman snowblower is backed by a manufacturer’s warranty covering defects in materials and workmanship․ Refer to the warranty card included with your purchase for specific terms, durations, and exclusions․ For support, visit the Craftsman website or contact their customer service hotline․ Online resources offer FAQs, parts diagrams, and troubleshooting assistance․

Craftsman Snowblower Model Variations
Craftsman offers a diverse range of snowblowers, from single-stage electric models ideal for light snowfall to powerful two-stage gas-powered units for heavier drifts․ Features vary by model, including engine size, clearing width, and chute control options․ Consult your specific model number to ensure compatibility with parts and maintenance procedures detailed within this guide․
Finding Replacement Parts
Genuine Craftsman replacement parts are crucial for maintaining your snowblower’s performance and longevity․ Parts can be sourced through the official Craftsman website, authorized service centers, or reputable online retailers specializing in outdoor power equipment․ Always have your model number readily available to ensure correct part selection and compatibility, avoiding potential issues․
Electrical System Overview
Your Craftsman snowblower’s electrical system powers the starter, headlight, and potentially heated handgrips․ It comprises a battery, ignition coil, starter solenoid, and wiring harness․ Regular inspection of wiring for damage is vital; Disconnect the spark plug wire before any electrical work to prevent accidental starting, ensuring safety during maintenance and repairs․