iHome Clock Radio: A Comprehensive Instruction Manual
This manual details setup, operation, and troubleshooting for your iHome clock radio, covering features like Bluetooth, USB charging, and alarm functions.
Understanding Your iHome Clock Radio
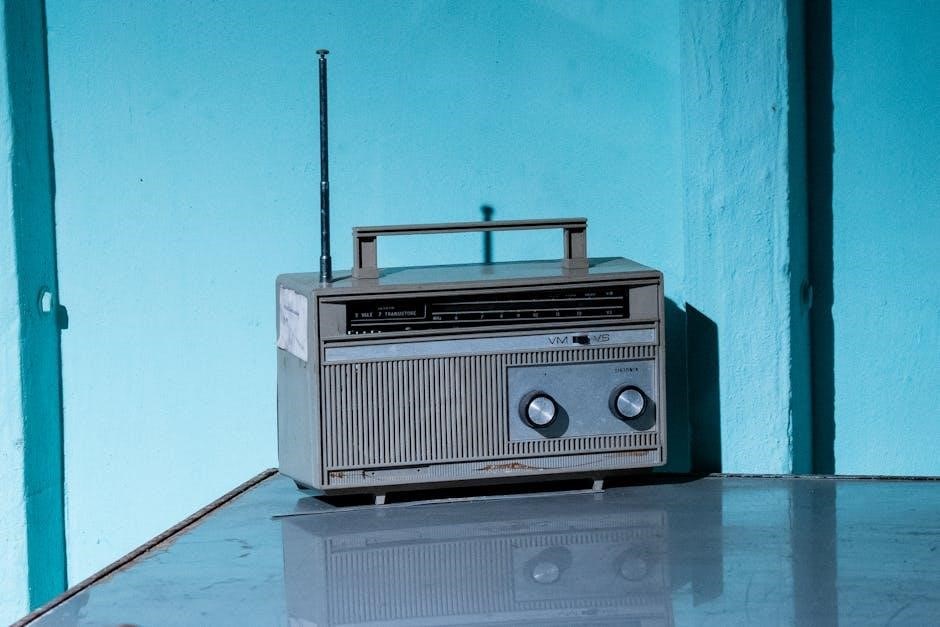
Your iHome clock radio is a versatile device combining timekeeping, audio playback, and convenient features like Bluetooth connectivity and USB charging. This unit supports FM/AM radio, allowing you to enjoy local stations. The integrated Bluetooth enables wireless streaming from smartphones and tablets.
Furthermore, it functions as a dual alarm clock, offering options for radio or buzzer wake-up calls. The display provides clear time visibility, with adjustable brightness settings. It’s designed for ease of use, featuring intuitive controls for setting alarms, tuning the radio, and managing Bluetooth connections; Battery backup ensures time and alarm settings are preserved during power outages. Explore all functionalities detailed within this comprehensive guide.
Unboxing and Initial Setup
Carefully unpack your iHome clock radio, ensuring all components are present: the radio unit itself, a power adapter, and this instruction manual. Inspect the unit for any visible damage. Place the radio on a stable, level surface, away from direct sunlight and excessive heat sources.
Connect the power adapter to the radio’s DC input and plug it into a wall outlet. Before powering on, verify the voltage compatibility. Initial setup involves setting the correct time and date, which can be done manually or automatically via radio signal (if supported). Familiarize yourself with the button layout and their corresponding functions as outlined in this guide for optimal use.
Powering On and Basic Functions
To power on your iHome clock radio, press the power button located on the top panel. The display will illuminate, showing the current time (if previously set). Use the volume control buttons (+/-) to adjust the speaker volume to a comfortable level. The ‘Source’ or ‘Mode’ button allows you to cycle through available input options – FM radio, AM radio, auxiliary input, or Bluetooth.
The ‘Menu’ or ‘Settings’ button accesses various customizable options. The display provides visual feedback for all selections. Explore these basic functions to become acquainted with the radio’s core operational features before delving into more advanced settings.

Setting the Time
Accurate timekeeping is crucial. This section guides you through both manual time setting and automatic synchronization via radio signals.
Manual Time Setting
To manually set the time, locate the ‘Time Set’ button on your iHome clock radio. Press and hold this button until the hour display begins to flash. Use the ‘Hour’ and ‘Minute’ buttons to adjust the time to your current local time.
Ensure you correctly identify AM or PM. Some models may require a separate AM/PM selection. Once the desired time is displayed, press the ‘Time Set’ button again to confirm your settings.
Double-check the displayed time to ensure accuracy. If adjustments are needed, repeat the process. Remember that manual time setting will require periodic adjustments, especially after daylight saving time changes.
Automatic Time Setting (Radio Controlled)
Your iHome clock radio may feature radio-controlled time synchronization. To activate this, ensure the unit has a clear reception of the radio signal. A ‘RCC’ or similar indicator will typically flash during the search process.
Optimal reception occurs at night, away from interference. The clock will automatically synchronize with a time signal transmitter. This process may take several minutes initially.
Once synchronized, the ‘RCC’ indicator will remain solid. The clock will automatically adjust for daylight saving time in supported regions. If synchronization fails, try relocating the unit or initiating a manual search within the settings menu.
Daylight Saving Time Adjustment
If your iHome clock radio doesn’t automatically adjust for Daylight Saving Time (DST), manual intervention is required. Access the clock’s settings menu, typically by pressing and holding the ‘Time Set’ or similar button.
Navigate to the DST option, often labeled as ‘DST ON/OFF’ or ‘Summer Time’. Toggle the setting to ‘ON’ when DST begins in your region, and ‘OFF’ when it ends.
The clock will then advance or revert the time by one hour accordingly. Refer to your local DST schedule for accurate dates. Some models may offer an ‘Auto DST’ function, relying on radio signal updates for automatic adjustments.
Radio Operation
Enjoy FM/AM radio by selecting the desired band and tuning into stations. Save favorites using preset buttons for quick access and enhanced listening.
Tuning to FM/AM Stations
To listen to your favorite radio stations, begin by selecting either the FM or AM band using the ‘Band’ button located on the unit’s control panel. Once the desired band is selected, utilize the ‘Tuning’ dial or the ‘Tune Up/Down’ buttons to scan through available frequencies.
For precise tuning, press and hold the ‘Tune Up/Down’ buttons until the station signal is clear and static-free. The radio features an antenna for improved reception; adjust its position for optimal signal strength. Some models offer auto-scan functionality, automatically searching for and storing available stations. Refer to your specific model’s diagram for button locations.
Presetting Radio Stations
To save your frequently listened-to stations, first tune to the desired station using the tuning methods described previously. Then, locate the ‘Preset’ or ‘Memory’ buttons on your iHome clock radio. Press and hold one of the numbered preset buttons (1-10, or similar) until you hear a confirmation beep or see an indicator light.
Repeat this process for each station you wish to save. To recall a preset station, simply press the corresponding preset button. Some models allow for preset scanning, cycling through saved stations. Consult your model’s specific instructions for detailed preset operation.
Using the Sleep Timer with Radio
The sleep timer allows the radio to automatically turn off after a specified duration, perfect for falling asleep to music. Press the ‘Sleep’ button repeatedly to cycle through available timer options – typically ranging from 15, 30, 60, or 90 minutes. Some models offer continuous play as an option.
Ensure the radio is tuned to your desired station before activating the sleep timer. A sleep timer indicator will illuminate, confirming activation. To cancel the sleep timer, press the ‘Sleep’ button until the indicator disappears. Refer to your specific model’s guide for precise sleep timer functionality.

Alarm Clock Features
Configure wake-up times, select radio or buzzer sounds, and adjust volume levels for a personalized alarm experience with your iHome clock radio.
Setting the Alarm
To set the alarm, press and hold the ‘Alarm Set’ button until the hour digits flash. Use the Hour and Minute buttons to set the desired wake-up time. Once set, press ‘Alarm Set’ again to confirm. You can activate or deactivate the alarm using the ‘Alarm’ button – a clock icon will appear on the display when active.
For dual alarms (if your model supports it), repeat the process for the second alarm. Ensure you’ve selected the correct alarm source (radio or buzzer) and volume level. Remember to check the AM/PM setting to avoid accidental wake-ups at the wrong time. Some models allow for gradual wake-up, increasing volume slowly;
Choosing Alarm Sound (Radio/Buzzer)
To select your preferred alarm sound, locate the ‘Source’ or ‘Alarm Sound’ button on your iHome clock radio. Pressing this button will cycle through available options, typically including FM radio, AM radio, and a traditional buzzer; The selected source will be indicated on the display.
If choosing radio, ensure a station is preset and clearly receivable. A weak signal may result in no sound or intermittent waking. For the buzzer, volume control is crucial – adjust it to a comfortable level. Some models offer nature sounds or other pre-loaded tones as alternatives to the standard buzzer.
Adjusting Alarm Volume
To adjust the alarm volume, use the ‘Volume’ or ‘+’ and ‘-’ buttons specifically when in alarm setting mode. These buttons may function differently than when adjusting general speaker volume. The display will typically show a volume level indicator as you make adjustments.
Start with a low volume and gradually increase it until it’s loud enough to wake you comfortably, but not jarringly. Consider your sleep environment; a noisy room requires higher volume. Some iHome models feature a progressive wake-up feature, starting at a low volume and gradually increasing it.
Using the Wake-Up Feature
The wake-up feature, often called ‘Gentle Wake’ or ‘Progressive Alarm’, gradually increases the alarm volume over a set period, typically several minutes. This provides a more natural and less startling awakening experience. To activate, navigate to the alarm settings and select the ‘Wake-Up’ or similar option.
You may be able to customize the duration of the gradual increase. Some models also allow you to choose from different wake-up sounds or even use your preferred radio station. Ensure the feature is enabled before setting your alarm time for optimal use. Experiment to find the ideal setting for your needs.

Bluetooth Connectivity
Connect wirelessly! This section guides you through pairing your device, playing music, and utilizing Bluetooth controls on your iHome clock radio system.
Pairing a Bluetooth Device
Initiate pairing mode on your iHome clock radio by pressing and holding the Bluetooth button until the indicator light flashes. Next, enable Bluetooth on your smartphone, tablet, or other compatible device and search for available devices. Locate “iHome iBTW39” (or similar model name) in the list of discovered devices and select it to begin the pairing process.
You may be prompted to enter a passcode; if so, enter “0000” or confirm the pairing request on both devices. Once successfully paired, the indicator light on the iHome radio will typically become solid, signifying a stable connection. Remember to disconnect any previously paired devices for optimal performance. Refer to the troubleshooting section if pairing fails.
Playing Music via Bluetooth
With your device successfully paired, initiate music playback from your smartphone or tablet. The audio will automatically stream through the iHome clock radio’s speakers. Utilize the volume controls on both your paired device and the iHome radio to adjust the sound level to your preference.
Playback controls – such as play/pause, skip forward, and skip backward – may be available directly on the iHome unit, depending on the model. If not, control playback through your connected device. Ensure a stable Bluetooth connection for uninterrupted audio. Interference can occur; move devices closer if experiencing dropouts.
Bluetooth Controls
Many iHome clock radios offer basic Bluetooth control buttons directly on the unit. These typically include a play/pause button, and volume up/down controls, allowing for convenient music management without needing to access your paired device. Some models also feature track skip buttons to move forward or backward through your playlist.
Refer to your specific model’s diagram for the exact location of these controls. If your iHome radio lacks dedicated Bluetooth controls, all functions must be managed via your smartphone or tablet. Ensure your device remains within Bluetooth range for consistent operation.
Advanced Features
Explore USB charging ports, display brightness adjustments, and battery backup capabilities for uninterrupted operation and enhanced convenience with your iHome radio.
Using the USB Charging Port
Your iHome clock radio features a convenient USB charging port, typically located on the back or side panel. This port allows you to charge compatible devices, such as smartphones, tablets, or other USB-powered accessories, directly from the radio.
To use the USB port, simply connect your device to it using a standard USB cable. Charging will commence automatically. Note that the charging speed may vary depending on your device and the cable used. The USB port provides a standard 5V output.
It’s important to remember that the USB port is primarily intended for charging and may not support data transfer. Do not connect devices requiring higher voltage or power than the port provides.
Display Brightness Adjustment
The iHome clock radio allows you to adjust the display brightness to suit your preferences and ambient lighting conditions. This feature ensures comfortable viewing, especially in dark rooms. Typically, dedicated buttons or a menu option control brightness levels.
To adjust the brightness, locate the “Dimmer” or “Brightness” button on the unit or navigate to the “Display” settings within the radio’s menu. Repeatedly pressing the button or using the menu controls will cycle through various brightness levels – High, Medium, Low, and Off.
Selecting “Off” will completely disable the display, conserving energy.
Battery Backup Information
Your iHome clock radio is equipped with a battery backup system to ensure the time and alarm settings are preserved during power outages. This feature prevents you from needing to reset your clock every time there’s a temporary loss of electricity.
The unit typically requires AAA or AA batteries (quantity varies by model) located in a dedicated battery compartment, usually on the back or bottom of the radio; Replace the batteries annually, or when the low battery indicator appears on the display.
Troubleshooting
This section provides solutions for common issues, including no sound, Bluetooth pairing problems, and incorrect time displays, ensuring optimal performance.
No Sound
If you experience no sound from your iHome clock radio, first verify the volume level is not muted or set too low. Ensure the correct audio source is selected – FM radio, AM radio, Bluetooth, or auxiliary input. Check that any connected headphones are properly plugged in and not causing a sound diversion.
For radio operation, confirm the antenna is extended and positioned for optimal reception. When using Bluetooth, ensure your paired device’s volume is also turned up and that music is actively playing. If utilizing the alarm, double-check the alarm volume setting. Finally, try disconnecting and reconnecting the power to reset the unit, potentially resolving software glitches causing the silence.
Bluetooth Pairing Issues
If you’re having trouble pairing your device with the iHome clock radio via Bluetooth, ensure Bluetooth is enabled on your smartphone or tablet. Confirm the iHome unit is in pairing mode – typically activated by pressing and holding the Bluetooth button until the indicator light flashes. Remove any previously paired devices from your device’s Bluetooth settings to avoid connection conflicts.
Bring your device closer to the iHome speaker during the pairing process. If pairing fails repeatedly, try resetting the iHome unit by disconnecting and reconnecting the power. Also, verify your device is compatible with the Bluetooth version supported by the iHome radio.
Clock Not Displaying Correct Time
If your iHome clock radio displays an incorrect time, first verify the correct time zone is selected. For automatic time setting (radio-controlled), ensure a clear signal reception – move the unit away from obstructions. If using manual time setting, carefully re-enter the hour and minute. Check if Daylight Saving Time is correctly enabled or disabled, depending on your location and the current season.
A low battery (if applicable) can also cause time inaccuracies. Replace the battery with a fresh one. If issues persist, try resetting the clock radio by disconnecting it from the power source for a few minutes, then reconnecting.
Safety Information
Always follow basic safety precautions when using this device. Avoid excessive heat, direct sunlight, and moisture to ensure long-lasting performance and prevent hazards.
Important Precautions
To ensure safe and optimal operation of your iHome clock radio, please adhere to the following precautions. Do not expose the unit to dripping or splashing liquids. Avoid placing the radio near heat sources like radiators or stoves.
Ensure the device is placed on a stable, level surface to prevent it from falling. Never attempt to disassemble or repair the unit yourself; contact qualified personnel for servicing.
Keep the device away from extreme temperatures and humidity. Clean only with a dry cloth; avoid using abrasive cleaners. Disconnect the power adapter during prolonged periods of non-use and during thunderstorms.
Use only the provided power adapter to avoid damage; Do not insert objects into vents, as this could cause electric shock or fire.
Cleaning and Maintenance
To maintain the appearance and functionality of your iHome clock radio, regular cleaning is recommended. Always disconnect the power adapter before cleaning. Use a soft, dry cloth to wipe the exterior surfaces of the unit.
Avoid using abrasive cleaners, solvents, or excessive moisture, as these can damage the finish. For stubborn stains, lightly dampen the cloth with water and gently wipe the affected area.
Ensure the unit is completely dry before reconnecting the power. Do not attempt to clean the internal components. Periodically check the power adapter and cable for any signs of damage.
Store the radio in a cool, dry place when not in use to prevent dust accumulation and potential damage.
Warranty Information
iHome Products carry a one-year limited warranty against defects in materials and workmanship from the date of original purchase. This warranty does not cover damage caused by misuse, accident, unauthorized repair, or normal wear and tear.
To obtain warranty service, please visit www.ihomeaudio.com for detailed instructions and contact information. Proof of purchase, including the date of sale, is required.
iHome does not warrant that the product will be free from interruptions or errors. This warranty gives you specific legal rights, and you may have other rights which vary from state to state.
For international warranty information, please refer to the documentation included with your product or visit the iHome website;