Minecraft Exploration Guide: A Comprehensive Overview
Embark on thrilling adventures! This guide details resource gathering, navigating diverse biomes, and mastering combat techniques for a fulfilling Minecraft experience.
I. Getting Started: Initial Exploration
Your Minecraft journey begins now! Upon world generation, familiarize yourself with surrounding biomes – forests and plains offer early-game resources. Prioritize essential first-day tasks: shelter construction before nightfall is paramount, safeguarding against hostile mobs. Begin basic resource gathering; wood is fundamental for crafting tools, while stone provides durability for upgrades.
Quickly craft a wooden pickaxe to acquire cobblestone, essential for a stone pickaxe and furnace. Food is crucial; gather berries or hunt animals. Remember, the first few nights are about survival. A simple dirt or wooden house will suffice initially. Explore cautiously, noting landmarks to avoid getting lost. Understanding these initial steps sets the foundation for successful exploration and progression within the Minecraft world.
A. World Generation & Biomes
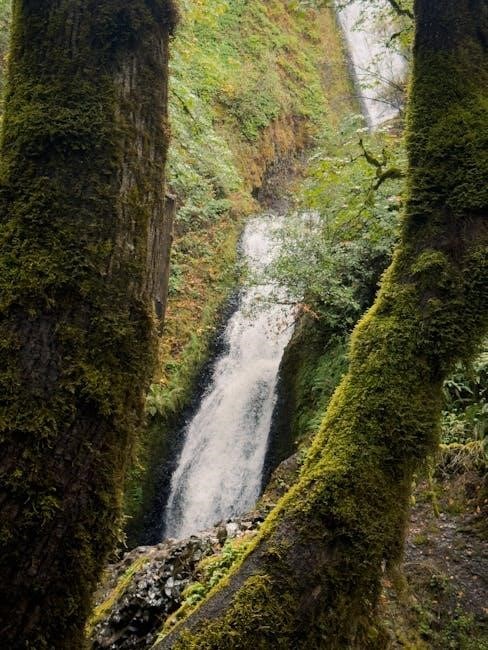
Minecraft’s worlds are vast and varied! World generation creates diverse landscapes, each defined by unique biomes. Forests provide ample wood, while plains offer open spaces for building and farming. Deserts present challenges with limited resources, but can harbor hidden structures. Savannas feature acacia trees and unique wildlife. Mountains offer vertical exploration and valuable ores, but require careful climbing.
Taigas are cold, forested biomes with spruce trees and potential for finding animals. Understanding biome-specific resources is key to efficient exploration. Each biome dictates available flora, fauna, and potential dangers. Learning to identify these differences allows for strategic resource gathering and preparation for environmental challenges. Explore thoroughly to discover the unique characteristics of each biome and maximize your survival potential.
B. Essential First-Day Tasks
Prioritize survival on day one! Immediately gather wood to craft essential tools – a crafting table, pickaxe, and axe. Construct a basic shelter before nightfall to protect against hostile mobs. This can be a simple dirt hut, but provides crucial safety. Locate a food source, such as animals or plants, to prevent starvation. Craft torches using coal or charcoal to illuminate your surroundings and deter monsters.
Making a bed is paramount; sleeping skips the dangerous night. Begin mining stone to upgrade your tools for increased efficiency. Explore the immediate area cautiously, noting resource locations. Remember, preparation is key to long-term survival. These initial tasks establish a foundation for successful exploration and progression in the Minecraft world. Don’t underestimate the importance of a safe first night!

C. Basic Resource Gathering (Wood, Stone)
Wood is fundamental! Begin by punching trees to acquire wood logs. Convert these logs into planks at your crafting table. Planks are used to create essential tools like crafting tables, sticks, and wooden tools. Next, locate a stone source – typically found by digging downwards. Craft a wooden pickaxe to mine stone effectively. Stone tools are significantly more durable and efficient than wooden ones.
Gather ample stone to create a stone pickaxe, axe, and shovel. Continue mining to obtain coal, crucial for torches. Prioritize gathering enough resources to upgrade your shelter and craft basic armor. Efficient resource gathering is the cornerstone of Minecraft survival. Remember to replant trees to ensure a sustainable wood supply for future crafting endeavors.
II. Navigating the Minecraft World
Orientation is key! Minecraft’s vastness demands effective navigation. Crafting a compass, using coal and iron, provides a consistent direction towards your spawn point. Utilize the F3 key (or Fn+F3 on some laptops) to display coordinates, pinpointing your exact location. Understanding chunk loading – the game’s system of generating terrain – is also vital.
Chunks load as you explore, revealing the world around you. Mapmaking, using paper and a compass, allows you to create visual representations of explored areas. Cartography helps document landmarks and points of interest. Mastering these techniques prevents getting lost and facilitates efficient travel across the expansive Minecraft landscape. Remember to regularly update your maps as you venture further!
A. Mapmaking & Cartography
Charting your course is essential! Mapmaking in Minecraft begins with combining eight paper and one compass on a crafting table, creating a blank map. Explore to reveal the surrounding terrain, automatically filling in the map as you move. Expanding map size requires additional paper. Cartography isn’t just about visual representation; it’s about documentation.
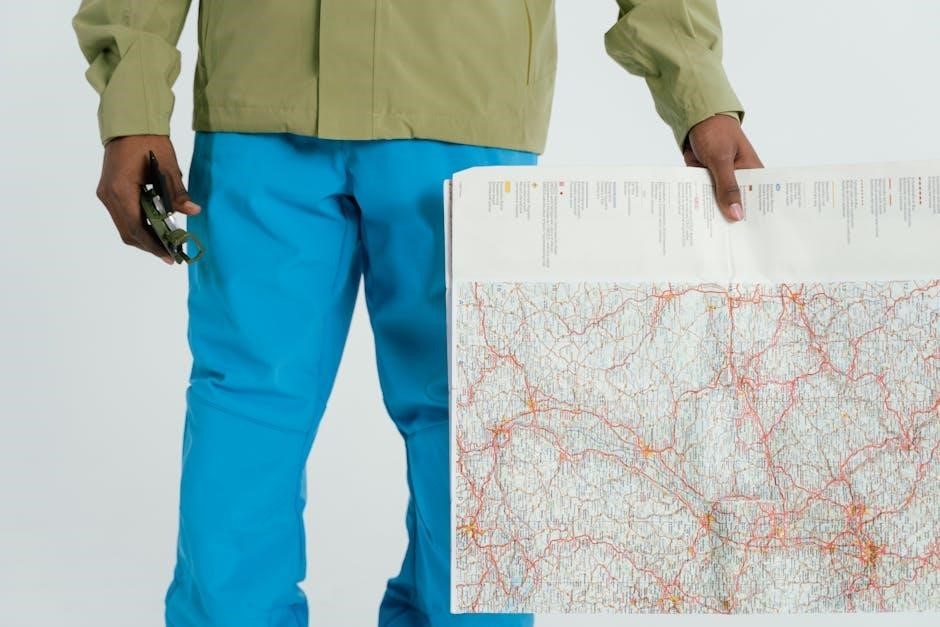
Locate key structures, mark resource hotspots, and create a personalized guide to your world. Maps can be cloned using cartography tables, allowing for multiple copies. Banners can be added to maps for visual cues. Regularly updating maps ensures accuracy as the world changes. Effective mapmaking transforms exploration from aimless wandering into a strategic endeavor, maximizing efficiency and minimizing lost time.
B. Utilizing Coordinates (F3)
Never get lost again! Pressing the F3 key (or Fn + F3 on some laptops) reveals a debug screen brimming with information, most crucially your current coordinates. These coordinates – X, Y, and Z – pinpoint your exact location within the Minecraft world. X and Z represent horizontal positioning, while Y indicates altitude.
Record these coordinates when discovering valuable resources, interesting structures, or dangerous areas. Sharing coordinates with friends facilitates collaborative exploration. Understanding coordinates is vital for recreating paths, returning to specific locations, and building efficient transportation systems. Mastering this feature transforms navigation from guesswork to precision, enhancing both safety and productivity during your adventures.
C; Understanding Chunk Loading
Optimize your exploration! Minecraft worlds are divided into “chunks,” 16×16 block areas. Only chunks within a certain radius of the player are actively loaded, meaning they are fully rendered and interactable. Chunks further away are unloaded to conserve system resources. This impacts exploration, as unloaded chunks don’t generate resources or allow mob spawning.
Your render distance setting determines how many chunks are loaded around you. Higher render distances reveal more of the world but demand greater processing power. Understanding chunk loading is crucial for efficient travel and resource gathering. Knowing when and where chunks load helps anticipate potential dangers and maximize exploration efficiency, especially when building large structures or establishing bases.
III. Essential Exploration Tools & Equipment
Prepare for adventure! Successful exploration hinges on having the right tools. A compass and clock are vital for orientation and timekeeping, especially when venturing far from base. Crafting sturdy armor (leather, iron, or better) and reliable weapons (swords, bows) is paramount for surviving encounters with hostile mobs. Don’t underestimate the importance of torches!
Effective illumination prevents mob spawns and reveals hidden dangers. Beyond the basics, consider bringing food for health restoration, pickaxes for mining, and shovels for digging. A water bucket can extinguish fires and provide a quick descent from heights. Prioritize crafting and upgrading these essentials to enhance your survivability and exploration capabilities throughout the Minecraft world.

A. Crafting a Compass & Clock
Essential orientation tools! A compass is crafted using four iron ingots and one redstone dust, arranged in a crafting table. It consistently points towards your world spawn point, invaluable for navigation, especially after extensive travel. A clock, created with one gold ingot and four redstone dust, displays the in-game time. Knowing the time is crucial for anticipating nightfall and preparing for potential mob spawns.
These seemingly simple items dramatically improve your exploration efficiency and safety. Always carry both; a compass prevents getting hopelessly lost, while a clock allows strategic planning. Remember, the compass points to the original spawn, not necessarily your base!
B. Building Basic Armor & Weapons
Prioritize self-defense! Early exploration demands basic protection. Crafting a wooden sword (two sticks and planks) provides initial combat capability. Upgrade to stone tools and armor (helmet, chestplate, leggings, boots) as quickly as possible – requiring stone and varying amounts of material. Iron is the next significant upgrade, offering superior durability and protection.
Don’t underestimate the value of a shield! Crafted with wood planks and an iron ingot, it deflects incoming damage. Regularly repair your gear using an anvil, ensuring its effectiveness. Prioritize armor over weapons initially; survival is paramount. A well-equipped explorer is a successful explorer!
C. Torches & Illumination Techniques
Light conquers darkness! Exploration is severely hampered without adequate illumination. Torches, crafted from coal or charcoal and a stick, are essential for cave exploration and deterring hostile mobs. Place them strategically to create safe pathways and mark explored areas. Consider alternative light sources as you progress.
Glowstone, found in the Nether, provides brighter, more permanent illumination. Sea Lanterns, obtained from ocean monuments, offer a unique aesthetic. Experiment with Jack o’Lanterns for a spooky ambiance. Remember, well-lit areas prevent mob spawns, significantly increasing your safety during extended exploration ventures. Don’t be left in the dark!
IV. Exploring Different Biomes
Minecraft’s world is diverse! Each biome presents unique challenges and resources. Forests & Plains offer early-game essentials like wood, food (animals), and relatively safe exploration. Deserts & Savannas demand careful hydration and offer unique structures like desert temples, but pose challenges with limited resources and exposure.
Mountains & Taigas reward vertical exploration with rare ores and stunning views, but require careful climbing and preparation for harsh conditions. Discover hidden caves and unique flora. Remember to adapt your strategies to each biome’s specific environment. Understanding biome-specific dangers and benefits is key to successful exploration!
A. Forests & Plains: Early Game Resources
Forests and plains are ideal starting points! These biomes provide abundant wood for tools and shelter, crucial for initial survival. Animals like cows, pigs, and chickens offer a reliable food source, essential for maintaining health during exploration. Plains offer open visibility, reducing surprise attacks from hostile mobs, making resource gathering safer.

Early exploration should focus on collecting enough wood to craft a crafting table, pickaxe, and axe. Building a basic shelter before nightfall is paramount. These biomes also contain passive mobs that provide leather for armor. Prioritize establishing a secure base and food supply within these accessible environments.
B. Deserts & Savannas: Unique Challenges
Deserts and savannas present distinct hurdles! Limited tree cover in deserts necessitates long journeys for wood, demanding efficient resource management. Savannas, while offering acacia trees, often lack readily available water sources. Both biomes experience intense heat during the day, increasing the risk of dehydration if not properly prepared.
Exploration in these areas requires careful planning. Finding oases or utilizing cacti for water is vital. Hostile mobs, like husks in deserts, pose a greater threat at night. Villages are occasionally found, offering trading opportunities. Prioritize building shade structures and carrying sufficient water to overcome the environmental challenges.
C. Mountains & Taigas: Vertical Exploration
Mountains and taigas demand skillful climbing and adaptation! These biomes feature significant elevation changes, requiring careful navigation and potentially the use of scaffolding or ender pearls for efficient ascent. Taigas, with their spruce forests, offer wood but can be sparsely populated. Mountains present ore exposure, making mining rewarding, but also dangerous due to potential falls.
Vertical exploration is key. Watch for goats that can knock you off cliffs! Both biomes often harbor hostile mobs, so torches are crucial for illumination and safety. Finding caves within mountains can lead to valuable resources. Prepare for colder temperatures in taigas, and always be mindful of your surroundings during climbs.
V. Dangerous Exploration & Combat
Exploration isn’t without peril! Hostile mobs like zombies, skeletons, and creepers emerge at night, demanding preparedness. Always carry a sword and shield for defense, and learn to effectively block attacks. Caves are particularly dangerous, often filled with monsters and pitfalls – torches are essential for visibility and deterring spawns.
Before venturing into the Nether, acquire strong armor and weapons. Ghasts, Piglins, and other Nether-specific mobs pose significant threats. Understand mob behavior; for example, creepers explode when near, and skeletons are vulnerable to headshots. Strategic combat, combined with awareness of your surroundings, is vital for survival during exploration.
A. Dealing with Hostile Mobs
Hostile mobs are a constant threat! Zombies and skeletons are common, vulnerable to sunlight but dangerous at night. Creepers require caution – they explode upon proximity, so maintain distance. Spiders can climb and poison you, necessitating a quick response. Learning their attack patterns is crucial for survival.
Effective combat involves blocking with a shield, timing attacks, and utilizing terrain to your advantage. Swords are primary weapons, while bows offer ranged attacks. Armor reduces damage, with diamond armor providing the best protection. Consider crafting potions for healing or strength. Awareness and preparation are key to overcoming these challenges during exploration.
B. Cave Exploration Safety
Caves offer rich resources, but also heightened danger! Always bring torches for illumination, preventing mob spawns and aiding navigation. Watch your step – falls can be fatal. Listen for sounds indicating nearby mobs, like zombie groans or spider skitters. Carry a shield for blocking unexpected attacks and a weapon for swift defense.
Be mindful of lava pools; they are a significant hazard. Consider bringing water buckets to extinguish yourself or create obsidian. Mining strategically prevents cave-ins. Mark your path with torches or blocks to avoid getting lost. Prioritize safety to maximize your rewards during subterranean exploration.
C. Preparing for the Nether

The Nether is a perilous dimension demanding thorough preparation! Diamond armor is highly recommended due to the increased damage. Bring a fire resistance potion – lava is abundant and deadly. A strong sword, preferably diamond or netherite, is crucial for combating hostile mobs like Ghasts and Piglins.
Food is essential; carry plenty of cooked steak or golden carrots. Consider bringing a water bucket, though it evaporates quickly, it can briefly protect against fire. Mark your Nether portal location carefully to avoid getting lost in the chaotic landscape. Prepare for intense combat and resource scarcity – the Nether tests even experienced players!
VI. Advanced Exploration Techniques
Venture beyond the basics with these expert strategies! Locating strongholds requires Eyes of Ender, thrown to reveal the direction. Ocean exploration benefits from conduits for underwater breathing and night vision. Mastering Elytra flight, combined with fireworks, unlocks unparalleled aerial mobility, allowing swift traversal of vast distances.
Cartography becomes vital for mapping extensive areas. Utilize advancements in mapmaking to create detailed and accurate representations of your surroundings. Remember chunk loading impacts exploration; actively explored chunks remain visible. These techniques transform you from a simple explorer into a seasoned adventurer, capable of uncovering Minecraft’s deepest secrets!
A. Finding Strongholds & End Portals
The quest for the End begins with locating a stronghold! These subterranean structures house the End Portal, your gateway to the final dimension. Utilize Eyes of Ender – crafted from Ender Pearls and Blaze Powder – by throwing them; they’ll fly towards the nearest stronghold. Follow their trajectory, and when they descend into the ground, you’re close!
Dig downwards carefully, as strongholds are complex labyrinths. Once inside, search for the End Portal Room, identifiable by the silverfish spawners. Activate the portal by placing Eyes of Ender into each of the twelve portal frame blocks. Prepare for a challenging battle and a journey to the End!
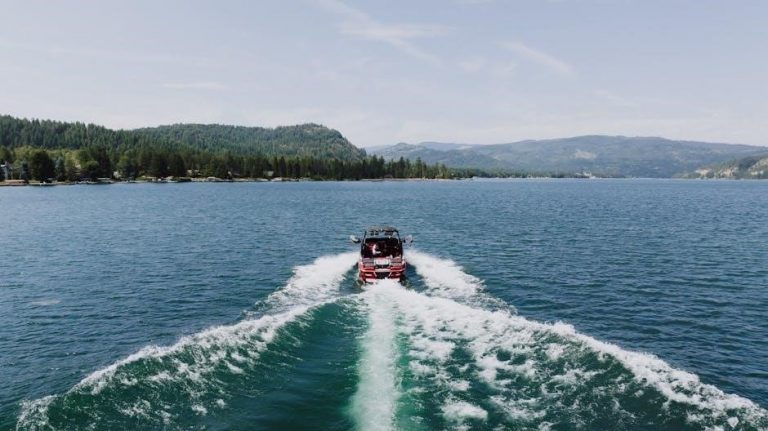
B. Ocean Exploration & Underwater Breathing
Dive into the depths! Ocean exploration reveals unique resources, shipwrecks, and ocean monuments guarded by powerful guardians. However, prolonged underwater stays require preparation. Initially, utilize potions of water breathing for extended dives. For a more permanent solution, seek out Conduits, powered by Nautilus Shells, creating a bubble of water breathing within a radius.
Explore coral reefs for vibrant scenery and valuable materials. Shipwrecks often contain treasure maps leading to buried loot. Be wary of drowned, hostile mobs that lurk in the ocean’s depths. Mastering underwater combat and resource gathering unlocks a whole new dimension of Minecraft exploration!
C. Utilizing Elytra for Flight

Take to the skies! Elytra, obtained from End Cities after defeating the Ender Dragon, revolutionize exploration. These glider wings allow for sustained flight, offering unparalleled freedom and speed. However, Elytra require careful use; launching from a height is crucial, and maintaining momentum is key.
Combine Elytra with fireworks for boosted flight, enabling long-distance travel and access to previously unreachable areas. Practice controlling your descent and navigating obstacles. Be mindful of durability – Elytra have limited uses and require mending to maintain. Mastering Elytra flight unlocks a new perspective on the Minecraft world, transforming exploration into a breathtaking experience!
VII. Resource Management During Exploration
Sustain your journey! Effective resource management is vital for prolonged exploration. Prioritize food sources – farming crops like wheat and carrots ensures a consistent supply. Hunting animals provides immediate sustenance, but farming is more reliable long-term. Optimize inventory space by crafting chests at temporary shelters and strategically discarding unnecessary items.
Building simple shelters offers protection from hostile mobs and a secure location to store resources. Beds allow you to skip the night, avoiding dangerous encounters. Regularly assess your supplies and replenish as needed. Careful planning and efficient resource allocation are crucial for surviving and thriving during extended expeditions.
A. Food Sources & Farming
Stay nourished on your travels! Food is paramount for restoring health and maintaining stamina during exploration. Early game options include hunting animals like pigs, cows, and chickens for meat. Berries found in taiga biomes offer a quick, though limited, source of sustenance. However, relying solely on hunting is unsustainable.

Farming provides a reliable food supply. Wheat, carrots, and potatoes are excellent choices, requiring only farmland and seeds. Bone meal accelerates growth. Consider building a small farm near your base or a temporary shelter. Fishing is another viable option, yielding both food and valuable items. Prioritize establishing a consistent food source to avoid starvation!
B. Inventory Management Strategies
Organization is key to efficient exploration! A cluttered inventory hinders progress and can lead to wasted time. Prioritize essential items: tools, weapons, food, and building materials. Utilize chests strategically placed at bases and outposts to store excess resources. Regularly sort your inventory, discarding unnecessary items;
Consider crafting shulker boxes, which provide portable storage. Stack similar items to maximize space. Utilize the crafting grid to combine materials directly from your inventory. Don’t hoard items “just in case;” assess their true necessity. Efficient inventory management allows you to carry more vital supplies, enhancing your exploration capabilities and overall survival.
C. Building Temporary Shelters
Swift shelter construction is crucial for surviving the first night! When venturing far from base, a quick shelter provides protection from hostile mobs. Digging into a hillside or creating a small dirt hut offers immediate safety. Prioritize a roof to prevent unwanted visitors. A crafting table and bed are essential additions for longer stays.
Even a simple structure significantly increases survival chances. Consider the surrounding terrain for natural defenses. Remember to light the interior with torches to prevent mob spawning. These temporary havens allow you to rest, organize, and prepare for continued exploration without constant threat. Efficient shelter building is a cornerstone of successful expeditions.
VIII. Utilizing Villagers for Exploration Benefits
Villagers offer invaluable support for explorers! Trading with villagers provides access to essential items like enchanted tools, maps, and food, streamlining your journey. Cartographer villagers specifically sell exploration maps, revealing ocean monuments and woodland mansions. Establishing a villager trading hall near your base is highly recommended.
Furthermore, constructing iron farms utilizing villagers and zombies generates a consistent supply of iron, vital for crafting superior gear. Protecting villagers from zombies is paramount to maintaining these benefits. Efficient villager management significantly enhances your exploration capabilities, reducing reliance on resource-intensive gathering and crafting.
A. Trading for Useful Items
Villager trading is a cornerstone of efficient exploration! Regularly interacting with villagers unlocks access to a diverse range of valuable items. Tools, weapons, armor, and enchanted books become readily available, bypassing lengthy crafting processes. Emeralds serve as the primary currency, obtainable through mining or trading with villagers themselves.
Specific professions offer unique trades; librarians provide enchanted books, toolsmiths offer durable tools, and cartographers sell exploration maps. Locking in favorable trades by preventing villagers from leveling up is a strategic advantage. Prioritize trades that accelerate your progress, such as obtaining diamond gear or rare resources, maximizing your exploration potential.

B. Villager-Based Iron Farms
Iron farms represent a pinnacle of resource automation for explorers! These structures exploit the mechanics of villager panic and iron golem spawning. By strategically housing villagers and a zombie, you induce a constant state of fear, prompting villagers to request iron golems for protection. These golems, upon spawning, drop significant quantities of iron.
Efficient farm designs require careful consideration of villager placement, bed counts, and workstation accessibility. Optimizing these factors maximizes iron production rates, ensuring a steady supply for crafting essential tools, armor, and building materials. A reliable iron source dramatically reduces the need for extensive mining, freeing up valuable time for exploration and adventure;
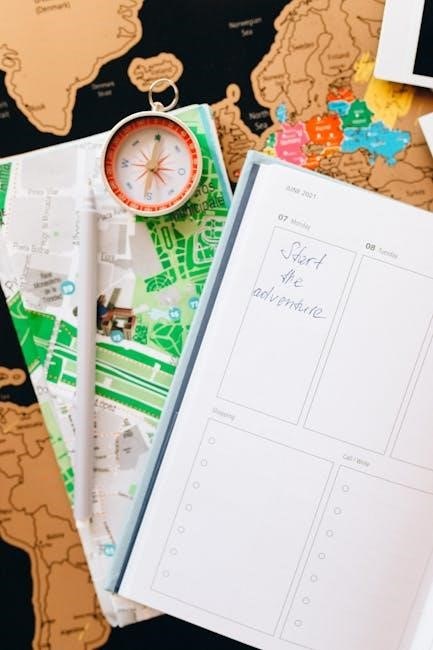
C. Mapping with Cartographer Villagers
Cartographer villagers are invaluable allies for any dedicated explorer! These specialized villagers offer a unique trading opportunity: incomplete maps leading to various structures, including woodland mansions, ocean monuments, and even buried treasure. Acquiring these maps significantly reduces the time and effort required to locate these otherwise hidden locations.
Trading with cartographers requires emeralds, obtainable through various means like mining or trading with other villagers. Regularly checking their trades is crucial, as their offerings refresh over time. Utilizing cartographer maps streamlines exploration, allowing players to focus on preparation and overcoming challenges within the discovered structures, rather than aimless searching.