New Age Cabinet Installation Instructions ⎻ Comprehensive Guide
This guide provides a step-by-step process for installing NewAge Pro 3.0 cabinetry, covering safety, mounting, connecting, worktop installation, and final alignment for a secure finish.
Welcome to the NewAge Cabinet Installation Guide! Before beginning, carefully review these instructions to ensure a safe and successful installation. Your satisfaction and safety are our top priorities. Important: If your cabinet arrives damaged, do not return it to the retailer. Immediately contact NewAge Products at 1-877-306-8930 (US) or 0800-031-4069 (UK), or visit supportnewageproducts.com for the fastest assistance and potential spare parts.
Safety First: Always wear appropriate safety glasses and work gloves during installation. Be mindful of your surroundings and ensure a clear, well-lit workspace. When using tools like box cutters to remove packaging, exercise extreme caution to avoid injury; If installing cabinets at an elevated height, adhere strictly to the dimensional requirements outlined later in this guide to prevent instability and potential hazards.

Professional Installation Recommended: While these instructions are designed for DIY installation, we strongly recommend professional installation to avoid potential issues and ensure proper functionality. Service calls to correct installation errors or provide usage instructions are not covered under warranty. Take your time, follow each step carefully, and double-check your work throughout the process.
Unpacking and Parts Verification
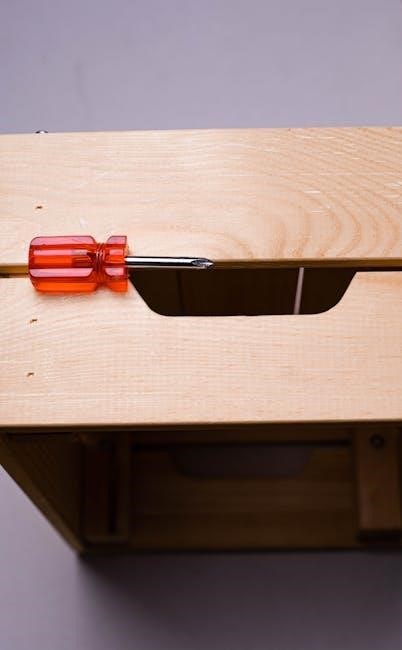
Carefully unpack all components from the shipping carton, taking care not to damage the cabinet surfaces. Utilize a box cutter to carefully remove all tapes and packaging materials, slicing through the sections of the packaging board; Important: Retain the packaging until you have verified all parts are present and the installation is complete. This will facilitate any potential returns or claims.
Inventory Check: Refer to the detailed Parts List (see section 4) to verify that all necessary components are included. This includes the cabinet itself, feet (if applicable), shelves, doors, hinges, worktop support brackets, and all associated hardware (screws, dowels, etc.). If any parts are missing or damaged, do not proceed with the installation. Contact NewAge Products immediately at 1-877-306-8930 (US) or 0800-031-4069 (UK), or via supportnewageproducts.com to request replacements.

Inspect for Damage: Thoroughly inspect each component for any signs of shipping damage, such as scratches, dents, or cracks. Document any damage with photographs and include them when contacting NewAge support. Accurate verification now will save time and frustration later in the installation process.
Tools Needed for Installation
Successful cabinet installation requires having the correct tools readily available. This ensures a smooth, efficient, and accurate process, minimizing potential errors and maximizing the longevity of your NewAge cabinetry. Before beginning, gather the following essential tools:
Essential Tools: A box cutter is crucial for safely opening packaging. A Phillips head screwdriver (manual or powered with adjustable clutch) is needed for most hardware. A level (at least 24 inches long) is vital for ensuring cabinets are plumb and square. A measuring tape is essential for accurate measurements. A pencil is useful for marking locations. A drill with appropriate drill bits (for pilot holes and securing to studs/drywall) is highly recommended.
Recommended Tools: A stud finder is invaluable for locating wall studs. A rubber mallet can assist with gently tapping components into place; Safety glasses are crucial for eye protection. Work gloves will protect your hands. A square will help ensure corners are 90 degrees. Having these tools prepared beforehand will significantly streamline the installation process and contribute to a professional finish.
Parts List ⎻ Detailed Inventory
Before commencing installation, carefully verify all components against the provided parts list. This crucial step ensures you have everything necessary to complete the project without interruption. Discrepancies should be reported immediately to NewAge Products at 1-877-306-8930 or via their support website (supportnewageproducts.com) – do not return items to the retailer.
Typical Components Include: Cabinet carcasses (verify quantity and dimensions), cabinet doors (check for correct style and quantity), adjustable shelves (count and inspect for damage), cabinet feet (ensure sufficient quantity), worktop support brackets (confirm number matches cabinet configuration), hardware packs (containing screws, hinges, and shelf supports), and potentially closet rods and cabinet hanger rails depending on your specific model.
Detailed Inspection: Examine each part for any shipping damage. Note any missing or damaged items on the packing slip. Refer to the index on page 2 for a quick reference guide to component locations and functions. A complete inventory prevents delays and ensures a successful installation. Contact NewAge for replacements if needed.
Installation Guide Overview
This comprehensive installation guide is designed to walk you through each stage of the NewAge Pro 3.0 cabinetry setup, from initial unpacking and preparation to final adjustments and finishing touches. We prioritize a secure and aesthetically pleasing result, offering detailed instructions for various mounting scenarios.
Key Stages Covered: The guide begins with unpacking and parts verification, followed by tool selection and site assessment. It then progresses through cabinet mounting – detailing methods for both drywall and stud walls. Subsequent sections cover worktop support bracket installation, worktop attachment (for two-cabinet configurations), and accessory installation like shelves and closet rods.
Final Adjustments: A significant portion focuses on door installation and precise adjustment using screws A and B for in/out and left/right alignment, respectively. Special attention is given to elevated cabinet installations, emphasizing dimensional requirements. Remember, service calls related to improper installation are not covered under warranty. For assistance, contact NewAge Products at 1-877-306-8930 or supportnewageproducts.com.
Preparing for Installation ⎻ Site Assessment
Before commencing installation, a thorough site assessment is crucial for a successful outcome. Begin by carefully inspecting the intended installation area, ensuring the floor and walls are level and structurally sound. Identify the location of wall studs – essential for secure cabinet mounting. For elevated cabinet installations, strictly adhere to the dimensional requirements outlined in figure 4, verifying adequate clearances.
Check for Obstructions: Inspect for any potential obstructions like pipes, electrical wiring, or ductwork within the wall cavity. Confirm sufficient space for cabinet doors to swing freely without interference. Assess the wall type – drywall requires different anchoring methods than solid stud walls.
Packaging Inspection: Simultaneously, carefully unpack the cabinets, verifying all parts are present against the detailed parts list. Report any damage immediately to NewAge Products at 1-877-306-8930 or supportnewageproducts.com – do not return damaged goods to the retailer. Proper preparation minimizes installation issues and ensures a lasting, professional finish.
Attaching Feet to Cabinets

Begin the assembly process by securely attaching the feet to the base of each cabinet. This step elevates the cabinets, providing a stable foundation and facilitating easier installation. Ensure the feet are properly aligned and tightened to prevent wobbling or unevenness. Refer to the parts list to confirm you have the correct number and type of feet for each cabinet.
Foot Adjustment: Many NewAge cabinet feet are adjustable, allowing for fine-tuning to compensate for minor floor irregularities. Utilize this feature to level the cabinets both front-to-back and side-to-side. A level cabinet base is critical for proper door alignment and overall stability.
Secure Fastening: Employ the appropriate screws (refer to the parts list) and a screwdriver to firmly attach the feet. Avoid over-tightening, which could damage the cabinet base. Once the feet are attached, carefully inspect each cabinet to ensure they are stable and level before proceeding to the next installation stage. This foundational step is vital for a professional finish.
Securing Cabinets to Drywall
When stud locations are unfavorable, securing cabinets directly to drywall is possible, but requires specialized anchors. Do not rely solely on drywall screws for substantial weight-bearing cabinets. Utilizing appropriate drywall anchors is crucial for a safe and lasting installation. Always consult the anchor manufacturer’s weight capacity ratings and ensure they exceed the combined weight of the cabinet and its contents.
Anchor Selection: NewAge recommends using heavy-duty toggle bolts or self-drilling drywall anchors designed for cabinet mounting. Avoid using plastic expansion anchors, as they offer limited support. Drill pilot holes according to the anchor instructions, ensuring a snug fit without damaging the drywall excessively.
Installation Procedure: Carefully align the cabinet against the wall and mark the anchor locations. Install the anchors, then secure the cabinet using screws of the appropriate length. Regularly inspect the anchors to confirm they remain firmly embedded in the drywall. Remember: Securing to studs is always the preferred method for maximum stability.
Securing Cabinets to Stud Walls
Locating wall studs is paramount for a robust and secure cabinet installation. Utilize a stud finder to accurately identify stud positions before commencing any drilling. Mark the stud locations clearly on the wall to ensure precise alignment during mounting. Always prioritize securing cabinets directly to studs whenever feasible, as this provides the strongest and most reliable support.

Fastener Selection: Employ screws of sufficient length to penetrate at least 1.5 inches into the stud. NewAge recommends using #8 or #10 wood screws for optimal holding power. Pre-drilling pilot holes slightly smaller than the screw diameter prevents wood splitting and facilitates easier screw insertion.
Installation Procedure: Align the cabinet against the wall, ensuring it is level. Drive screws through the cabinet’s mounting rails and directly into the studs. Use a minimum of two screws per stud for each cabinet. Regularly check the cabinet’s stability and tighten screws as needed. Important: Avoid over-tightening, which can strip the screw holes.
Hanging Cabinets on Stud Walls ⎻ Step-by-Step
Step 1: Marking Stud Locations – After locating studs, transfer these positions onto the cabinet’s mounting rail. Precision is key for secure attachment. Step 2: Pre-Drilling – Drill pilot holes through the mounting rail at the marked stud locations. This prevents wood splitting and eases screw insertion.

Step 3: Initial Cabinet Placement – Carefully lift the cabinet into position, aligning the pre-drilled holes with the marked studs on the wall. Ensure the cabinet is level using a spirit level. Step 4: Securing with Screws – Insert and tighten screws through the mounting rail and into the studs. Use a minimum of two screws per stud for each cabinet, ensuring a firm hold.
Step 5: Level and Stability Check – Re-check the cabinet’s level and stability. Adjust screws as needed to achieve perfect alignment. Step 6: Repeat for Additional Cabinets – Follow these steps for each subsequent cabinet, ensuring consistent alignment and secure attachment to the stud walls. Remember to prioritize safety throughout the process.
Installing Worktop Support Brackets
Essential for Stability: Worktop support brackets are crucial for reinforcing the connection between cabinets and worktops, especially in configurations with two cabinets joined together. These brackets prevent sagging and ensure long-term durability.
Bracket Placement: Position the support brackets evenly along the underside of the worktop, typically near the front edge of the cabinets. Ensure they align with the cabinet frames for maximum support. Securing the Brackets: Use appropriate screws to attach the brackets to both the worktop and the cabinet frames. Pre-drilling pilot holes is recommended to prevent splitting.

Quantity and Spacing: The number of brackets needed depends on the length of the worktop and the anticipated load. Generally, space brackets every 16-24 inches. Final Check: Once installed, verify that the brackets are securely fastened and provide adequate support. A properly installed bracket system will significantly enhance the stability and longevity of your cabinet installation.
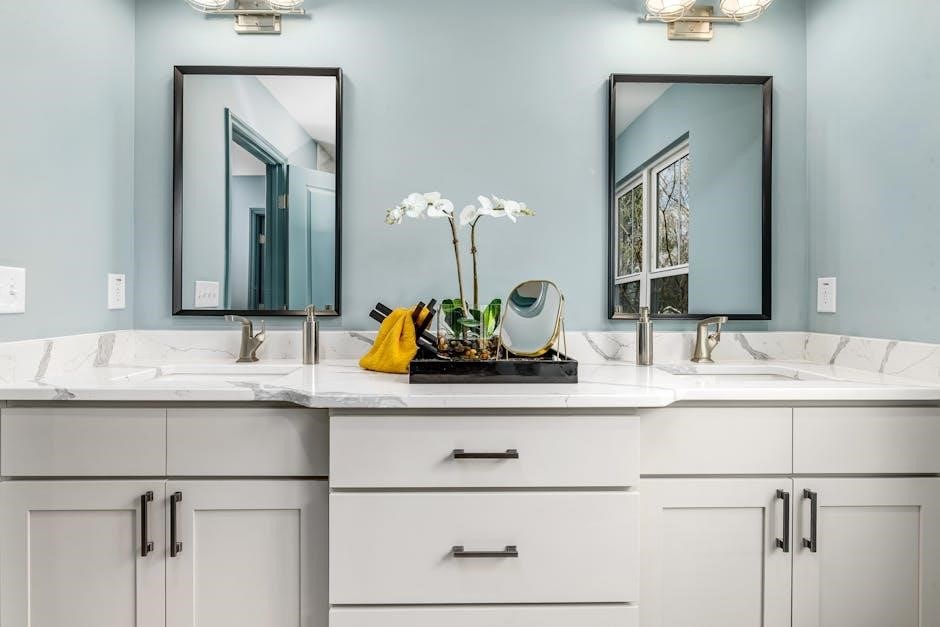
Attaching Worktops (Two Cabinet Configuration)
Preparing for Attachment: When joining two cabinets with a worktop, ensure both cabinet units are level and securely fastened to the wall. This provides a stable base for the worktop installation. Alignment is Key: Carefully align the worktop with the cabinet frames, ensuring an even overhang on all sides. Use clamps to hold the worktop in place during the attachment process.
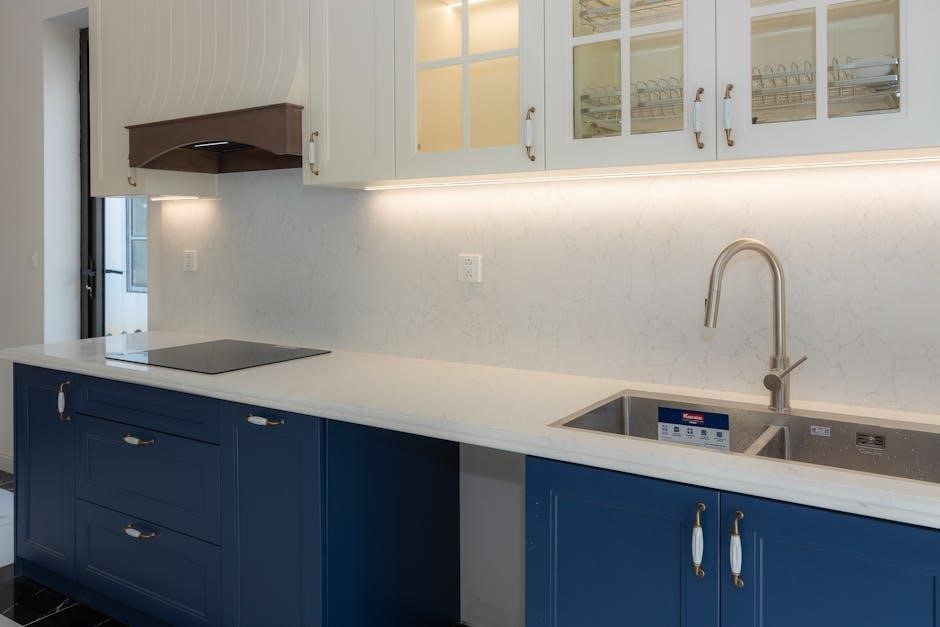
Securing the Worktop: From underneath, use screws to attach the worktop to the cabinet frames. Pre-drilling pilot holes is highly recommended to prevent wood splitting. Worktop Support Brackets: Install worktop support brackets (refer to the previous section) to provide additional reinforcement, especially along the joint between the two cabinets.
Sealing the Joint: After securing the worktop, apply a bead of silicone sealant along the joint where the two cabinets meet to prevent water damage and create a seamless appearance. Final Inspection: Double-check all screws and brackets to ensure they are tight and secure. A properly attached worktop will provide a durable and functional surface.
Guidelines and Weight Capacity
Important Considerations: NewAge cabinets are designed for residential use. Proper installation, following these guidelines, is crucial for safety and longevity. Weight Distribution: Distribute weight evenly across the worktop and within cabinets to avoid overloading any single area. Avoid concentrating heavy items in one spot.
Maximum Load Limits: Each cabinet, when properly installed and supported, can typically hold up to 50 lbs (22.7 kg). Worktops can generally support up to 200 lbs (90.7 kg), but this depends on the span and support bracket configuration. Shelf Capacity: Adjustable shelves have a lower weight capacity, approximately 30 lbs (13.6 kg) each. Do not exceed these limits.
Installation Integrity: Ensure cabinets are securely attached to wall studs or drywall with appropriate hardware. Improper installation voids the warranty and compromises safety. Service Calls: NewAge does not cover service calls related to incorrect installation or misuse. Always consult these instructions and seek professional help if needed.
Installing Shelves ⎻ Adjustable Options
Shelf Support System: NewAge cabinets feature adjustable shelf supports, providing flexibility in storage configuration. These supports consist of small shelf pins that insert into pre-drilled holes along the cabinet interior sides. Pin Placement: Carefully insert four shelf pins into the desired holes at the same height on both sides of the cabinet. Ensure the pins are fully seated for secure shelf placement.
Shelf Installation: Gently lower the shelf onto the installed pins. Verify the shelf is level and securely resting on all four pins. Adjustability: To reposition shelves, simply lift the shelf, remove the pins, and re-insert them into new holes at the desired height. Repeat for all shelves needing adjustment.
Weight Considerations: Remember that adjustable shelves have a maximum weight capacity of approximately 30 lbs (13.6 kg) each. Distribute weight evenly across the shelf surface. Secure Fit: Periodically check the shelf pins to ensure they remain securely in place, especially after loading and unloading items.
Installing Closet Rods
Rod Installation Prep: Begin by identifying the desired height for your closet rod within the cabinet. NewAge cabinets designed for closet functionality include pre-drilled holes to facilitate easy rod installation. Bracket Attachment: Secure the closet rod brackets to the cabinet’s interior sides using the provided screws. Ensure the brackets are level and firmly attached for optimal support.
Rod Placement: Carefully insert the closet rod ends into the attached brackets. Verify the rod is securely seated and extends fully across the cabinet width. Weight Capacity: Be mindful of the weight capacity of the closet rod, typically around 20 lbs (9 kg). Avoid overloading the rod with heavy items to prevent bending or breakage.
Stability Check: Gently test the stability of the installed rod by applying slight downward pressure. If any wobbling or instability is detected, re-tighten the bracket screws. Optional Support: For wider cabinets, consider adding a center support bracket to enhance rod stability and prevent sagging.
Cabinet Hanger Rail Installation
Rail Selection & Preparation: NewAge recommends utilizing the Cabinet Hanger Rail for simplified and secure cabinet mounting. Ensure the rail is the appropriate length for your cabinet configuration. Prior to installation, verify the wall is suitable for supporting the rail’s weight and the cabinet’s load.
Rail Mounting: Position the hanger rail horizontally along the wall at the desired cabinet height. Using a level, confirm the rail is perfectly aligned. Secure the rail to wall studs whenever possible for maximum stability. If studs are not accessible, utilize appropriate wall anchors designed for the wall type.
Cabinet Engagement: Carefully lift the cabinet and align the integrated hanging brackets with the installed hanger rail. Gently lower the cabinet onto the rail, ensuring the brackets fully engage and lock into place. Security Check: Once the cabinet is mounted, perform a thorough stability check. Gently apply pressure to various points to confirm a secure and wobble-free installation.
Connecting Cabinets ‒ Achieving a Seamless Fit
Alignment is Key: To achieve a professional and visually appealing installation, precise alignment of adjacent cabinets is crucial. Begin by positioning the cabinets side-by-side, ensuring the work surfaces are perfectly level and flush. Any discrepancies at this stage will be magnified during subsequent steps.
Connector Placement: Locate the pre-drilled connector holes on the adjoining cabinet sides. These holes are strategically positioned to provide a strong and stable connection. Insert the provided cabinet connectors into these holes, ensuring they are fully seated.
Securing the Connection: Using a screwdriver, tighten the connector screws to draw the cabinets firmly together. Avoid over-tightening, as this could potentially damage the cabinet material. Periodically check alignment during tightening to maintain a seamless fit. Final Inspection: Once connected, inspect the joint for any gaps or misalignments. Minor adjustments can be made by slightly loosening and re-tightening the connector screws.
Door Installation ⎻ Initial Attachment
Preparing for Door Attachment: Before attaching the doors, ensure the cabinet frame is securely installed and level. Verify you have the correct door for each cabinet opening. Identify the hinge mounting plates already affixed to the cabinet interior – these are crucial for proper door alignment.
Hinge Alignment: Carefully align the hinges on the door with the corresponding mounting plates inside the cabinet. Gently push the door into position, ensuring the hinges engage fully with the plates. You should hear a click or feel a secure connection.
Initial Securing: Initially, only attach the top hinge to allow for adjustments. Do not fully tighten the screws at this stage. This allows for flexibility in adjusting the door’s position later. Repeat this process for all remaining doors, attaching only the top hinge initially. Temporary Check: Briefly test the swing of each door to confirm it moves freely and doesn’t bind against the cabinet frame or adjacent doors.
Door Adjustment ‒ In/Out Adjustment (Screw A)
Understanding the Adjustment: The ‘in/out’ adjustment controls the distance between the door and the cabinet frame. This is crucial for achieving a flush, consistent look and preventing rubbing. Locate screw ‘A’ on the hinge mechanism – this is your primary control for this adjustment.
Making the Adjustment: To move the door outward, away from the cabinet frame, turn screw ‘A’ counterclockwise. This will increase the gap. Conversely, to bring the door inward, closer to the frame, turn screw ‘A’ clockwise. Make small, incremental adjustments – a quarter turn at a time – and frequently check the door’s alignment.
Visual Inspection: After each adjustment, carefully inspect the gap around the door. Look for consistent spacing along the top, bottom, and sides. If the door rubs against the frame, continue adjusting screw ‘A’ until the rubbing stops. Final Tightening: Once the desired alignment is achieved, fully tighten screw ‘A’ to secure the adjustment. Repeat this process for each door.
Door Adjustment ⎻ Left/Right Adjustment (Screw B)
Addressing Misalignment: The ‘left/right’ adjustment, controlled by screw ‘B’, corrects situations where the door isn’t perfectly aligned horizontally with the cabinet frame. This ensures even spacing and a professional finish. Locate screw ‘B’ on the hinge – it’s your key to side-to-side alignment.
The Adjustment Process: To move the door to the left, turn screw ‘B’ clockwise. This will shift the door in that direction. To move the door to the right, turn screw ‘B’ counterclockwise. As with the in/out adjustment, make small adjustments – a quarter turn is a good starting point – and consistently check the results.
Precise Alignment: Observe the gap between the door and the adjacent cabinet or panel. The goal is to achieve a uniform gap along the entire length of the door. If the door is too close on one side and too far on the other, continue adjusting screw ‘B’ until the spacing is even. Secure the Setting: Once aligned, tighten screw ‘B’ firmly to maintain the adjustment. Repeat for all doors.
Door Spacing & Alignment ‒ Fine Tuning
Achieving a Seamless Look: After initial door installation and hinge adjustments (using screws A & B), fine-tuning is crucial for a truly professional finish. This stage focuses on ensuring consistent gaps between doors and achieving perfect alignment with the cabinet frame.
Visual Inspection: Carefully examine each door. Look for uneven gaps – areas where the door is too close to the frame or noticeably further away. These inconsistencies are what fine-tuning addresses. Use a straight edge to visually confirm alignment along the top, bottom, and sides of each door.
Iterative Adjustments: Return to screws A and B as needed. Small adjustments are key! A slight turn of either screw can make a significant difference. Alternate between adjusting the in/out (screw A) and left/right (screw B) positions until the desired spacing is achieved. Patience is vital. Consistent checking and minor adjustments will yield the best results. Remember to tighten screws after each adjustment to secure the setting.
Elevated Cabinet Installation ‒ Dimensional Requirements
Planning for Height: Installing cabinets at an elevated level requires precise dimensional planning to ensure stability and a professional appearance. This is particularly important in kitchens or spaces with specific ergonomic needs.
Critical Measurements: Before commencing installation, meticulously verify the required clearances as illustrated in Figure 4 (refer to accompanying diagrams). These dimensions dictate the space between the cabinet base and the floor, as well as any overhead obstructions. Accurate measurements prevent future issues with appliance fit or usability.
Cabinet Compatibility: Ensure the cabinet itself conforms to the dimensional specifications outlined in Figure 4. Deviations can compromise the structural integrity and aesthetic appeal of the installation. Double-check all measurements against the cabinet’s physical dimensions before proceeding. Proper planning and adherence to these requirements are essential for a secure and visually pleasing elevated cabinet setup. Ignoring these details can lead to instability or require costly rework.
Warranty Information & Claim Process
NewAge Products offers a warranty protecting against manufacturing defects on all cabinetry. This warranty covers materials and workmanship under normal use, ensuring long-term satisfaction with your purchase. However, it’s crucial to understand the limitations.
Exclusions Apply: The warranty does not cover damage resulting from improper installation, misuse, abuse, or alterations. Service calls specifically to correct installation errors, or to provide instruction on installation or product use, are also excluded. Professional installation is highly recommended to maintain warranty validity.
Filing a Claim: To initiate a warranty claim, do not return the product to the retailer. Instead, contact NewAge Products directly at 1-877-306-8930 (for US customers) or 0800-031-4069 (for UK customers). Alternatively, submit your claim via supportnewageproducts.com. Be prepared to provide proof of purchase, detailed descriptions of the defect, and photographic evidence. NewAge will assess the claim and determine the appropriate resolution, which may include repair, replacement, or refund.
Customer Support & Troubleshooting
Need assistance with your NewAge cabinet installation? Our dedicated customer support team is here to help! We understand that even with detailed instructions, challenges can arise. Don’t hesitate to reach out – we’re committed to ensuring a smooth and successful installation experience.
For the fastest service, contact NewAge Products directly. You can reach us at 1-877-306-8930 for customers in the US, or 0800-031-4069 for those in the UK. Alternatively, visit our comprehensive support website at supportnewageproducts.com. Here you’ll find frequently asked questions, helpful videos, and downloadable resources.
Common Troubleshooting: Issues with door alignment are often resolved by adjusting the hinge screws (A for in/out, B for left/right). If cabinets aren’t level, check the feet and adjust accordingly. Remember, proper mounting to studs or drywall is crucial for stability. Avoid attempting complex repairs yourself; contact support for guidance. We are here to resolve any issues and ensure your cabinets are securely and beautifully installed.