Understanding Press-On Nail Sizes
Navigating the world of press-on nails requires understanding that a proper fit is crucial for both appearance and wearability.
Finding the correct size ensures a secure, natural-looking application, preventing lifting and potential damage to your natural nails.
Why Accurate Sizing Matters
Achieving a flawless press-on nail application hinges on accurate sizing, extending far beyond mere aesthetics. Incorrectly sized nails can lead to a multitude of issues, compromising both the look and longevity of your manicure. Nails that are too small risk popping off easily, causing frustration and potential damage to the natural nail bed.
Conversely, press-ons that are too large can create an unnatural, bulky appearance and may also lift prematurely. A proper fit ensures the nail adheres securely, mimicking the appearance of a professional salon manicure. Furthermore, selecting the right size minimizes stress on your natural nails, preventing breakage and promoting healthy nail growth.
Choosing the larger size and filing down for a better fit, as suggested by Lilac St., is a practical solution for in-between measurements, demonstrating the importance of adaptability in achieving optimal sizing.
Standard Press-On Nail Sizing System
The press-on nail industry generally employs a numerical sizing system, though variations can exist between brands. Typically, sizes range from 0 to 9, with 0 being the widest and 9 the narrowest. These numbers correspond to the width of the nail bed, not the length. It’s crucial to understand this distinction when selecting your sizes.
Most sets include a range of sizes to accommodate different nail widths. Many manufacturers mark the underside of each nail with its corresponding number, facilitating future applications by allowing you to easily recall your ideal sizes. Clawcreature highlights that press-ons adhere to standard sizing, meaning a size 5 from one brand will generally fit similarly to a size 5 from another.
However, individual nail beds vary, so relying solely on a previous size isn’t always foolproof; periodic re-measurement is recommended for consistent results.

Measuring Your Nails for Press-On Application
Accurate measurement is key to a flawless press-on manicure. Taking the time to properly size each nail ensures a comfortable and secure fit for lasting beauty.

Tools You’ll Need for Measurement
Preparing to measure your nails for press-on application doesn’t require a lot of specialized equipment, thankfully! The most essential tool is a nail sizing kit, often included with press-on nail purchases or available separately. These kits contain a range of nail sizes to help you find the perfect match.
Alternatively, if a kit isn’t readily available, you can use a standard ruler or measuring tape, preferably one with millimeter markings for greater precision. A nail file or buffer is also helpful for gently adjusting the size if you find yourself between standard measurements.
Finally, having a pen or pencil and a piece of paper to record the corresponding nail numbers or measurements for future reference is highly recommended. This saves time and ensures consistent sizing with subsequent applications. A well-lit space is also crucial for accurate visual assessment.
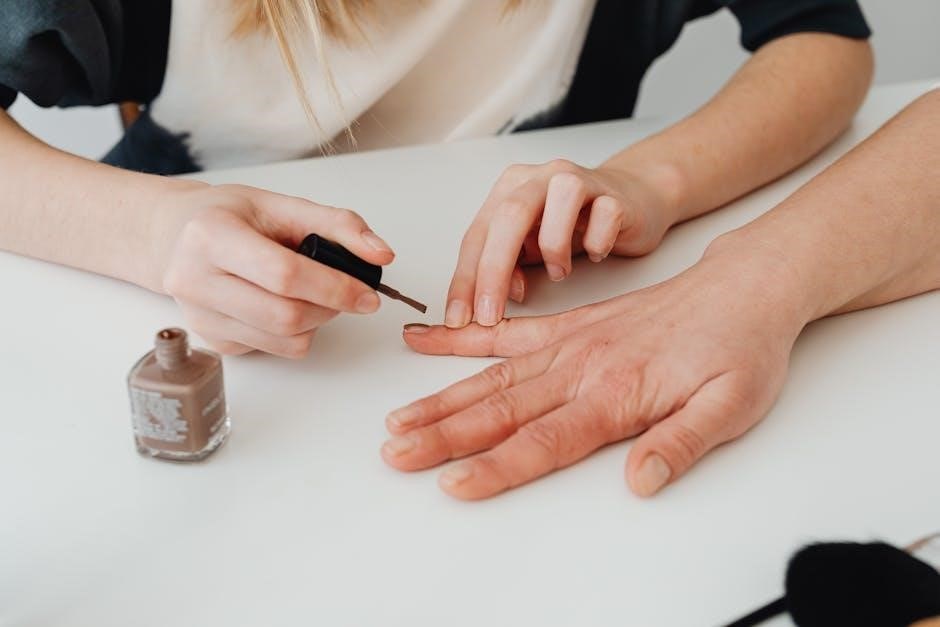
Step-by-Step Nail Measurement Guide
Begin by selecting a nail from the sizing kit that closely matches the width of your natural nail, covering it entirely from side to side. If using a ruler, measure the width of your nail in millimeters. Repeat this process for each nail, as sizes can vary.
Important: It’s better to choose a slightly larger size if you’re between measurements; you can always file down the sides for a custom fit. Note the corresponding number on the underside of each nail, or record the millimeter measurement for each finger.
Ensure you measure all ten nails, as hands are rarely symmetrical. Take your time and double-check each measurement to guarantee accuracy. This detailed approach will significantly improve the fit and longevity of your press-on manicure.
Dealing with In-Between Sizes
Encountering nails that fall between standard sizes is common, but easily addressed. When this happens, always opt for the larger size; it’s far simpler to refine a nail that’s too wide than to stretch one that’s too narrow.
Utilize a nail buffer to gently file down the sides of the larger press-on nail until it perfectly conforms to your nail bed’s width. Focus on the sidewalls, creating a snug, comfortable fit. Avoid filing the area that adheres to your nail, as this compromises the bond.
Remember, a slightly adjusted nail provides a more secure and natural look than a forced fit. This minor adjustment ensures a flawless application and prevents premature lifting, extending the life of your manicure.

Press-On Nail Size Charts & Guides
Comprehensive charts detail common nail width measurements and corresponding length options, simplifying size selection; These guides are essential for achieving a perfect, customized fit.
Common Nail Width Measurements
Understanding nail width is paramount when selecting press-on nails. Typically, sizing revolves around millimeters, though many brands utilize numbered systems for convenience. A common starting point involves measuring the widest part of your natural nail, excluding the cuticle. Here’s a general breakdown:
- Size 0-2 (approx. 6-8mm): Often suited for petite hands or smaller nail beds.
- Size 3-5 (approx. 9-11mm): A frequently encountered range, fitting a majority of individuals.
- Size 6-8 (approx. 12-14mm): Ideal for those with broader nail plates or larger hands.
- Size 9-10 (approx. 15mm+): Designed for wider nail beds, providing a comfortable, secure fit.
It’s crucial to remember that these are approximate values; variations exist between brands. Many press-on nail sets include a sizing card, allowing you to try each size before application. Taking note of the numbers that best fit each finger will save time during future applications, ensuring a consistently flawless manicure.
Nail Length Options & Corresponding Sizes
Press-on nails offer a diverse range of lengths, each influencing the corresponding size needed for a comfortable and aesthetically pleasing fit. Length is typically measured in millimeters or indicated by descriptive terms like ‘short,’ ‘medium,’ or ‘long.’ Shorter lengths (under 15mm) generally require smaller sizes (0-5), prioritizing width for a natural look.
- Short (under 15mm): Sizes 0-5 are typically suitable.
- Medium (15-20mm): Sizes 3-7 often provide the best fit.
- Long (20mm+): Sizes 6-10 are commonly used, potentially requiring adjustments.
Longer nails may necessitate wider sizes to maintain structural integrity and prevent breakage. Remember that individual nail bed shapes and widths still play a significant role. Utilizing a sizing kit or carefully comparing your nail width to the brand’s size chart is essential for achieving a perfect match, regardless of the chosen length.

Shape and Size Considerations
Nail shape significantly impacts how a press-on feels and looks; wider shapes like stiletto or coffin may require a slightly larger size for full coverage and comfort.
How Nail Shape Affects Size Choice
Selecting the appropriate press-on nail size isn’t solely about width; the shape of your natural nail and the press-on itself play a vital role. Different shapes distribute coverage differently, influencing how the nail adheres and feels. For instance, a square or round nail shape generally aligns well with standard sizing charts, offering a more predictable fit.
However, more dramatic shapes like stiletto, coffin, or almond require careful consideration. These shapes tend to be wider at the base and taper towards the tip. Consequently, you might need to size up to ensure the sides of the press-on fully cover your natural nail plate, preventing gaps and lifting. Conversely, if you have naturally narrow nail beds and choose a very full shape, sizing down might be necessary.
It’s also important to remember that the curvature of the nail bed differs between shapes. A flatter nail bed might work well with a squoval press-on, while a more curved nail bed might benefit from a rounded or almond shape. Always prioritize full coverage without excessive overhang to achieve a seamless and long-lasting manicure.
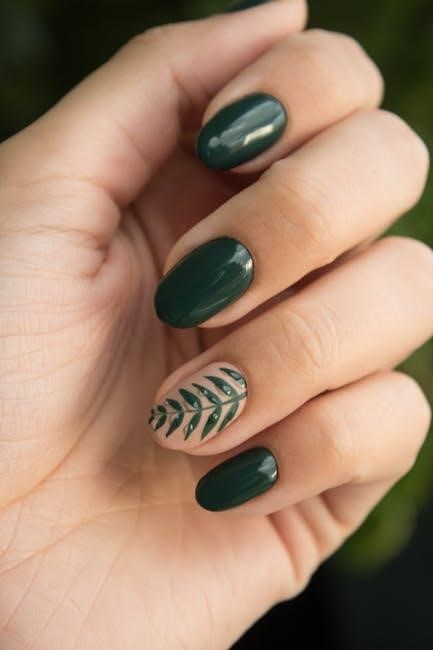
Different Press-On Nail Shapes Available
The press-on nail market boasts a diverse array of shapes, catering to various style preferences and nail bed types. Classic shapes include square, offering a clean, modern look, and round, providing a soft, natural aesthetic. Oval and squoval shapes blend the best of both worlds, offering a balanced appearance.
For those seeking bolder styles, almond and stiletto shapes elongate the fingers and create a dramatic effect. Coffin (or ballerina) nails are characterized by a tapered shape with a flat tip, offering a sophisticated and trendy look. Edge, flare, and mountain shapes are even more extreme, designed for statement manicures.
When choosing a shape, consider your lifestyle and nail length. Longer, more pointed shapes are prone to breakage and may not be practical for everyday activities. Remember that shape influences perceived nail width, impacting size selection – wider shapes often require slightly larger sizes for full coverage.

Troubleshooting Sizing Issues
Addressing fit problems is common; if nails are too small, consider a larger size and filing the sides for a custom fit.
Conversely, filing can also refine nails that are too large.
What to Do If Press-Ons Are Too Small
Encountering press-on nails that are too small can be frustrating, but it’s a solvable issue! The primary recommendation is to immediately size up. It’s generally better to choose a slightly larger nail and adjust it, rather than attempting to make a nail that’s too small fit securely. A nail that’s too small won’t fully cover your natural nail, leading to lifting at the edges and a less aesthetically pleasing appearance.
Once you’ve selected a larger size, utilize a nail file or buffer to carefully refine the sides of the press-on. Gently file down the edges until you achieve a comfortable and secure fit that closely matches the width of your natural nail. Be cautious not to over-file, as this can compromise the structural integrity of the press-on. Remember, a snug fit is key for longevity and preventing damage to your natural nails. Taking the time to properly adjust the size will result in a much more satisfying and durable manicure.
What to Do If Press-Ons Are Too Large
Discovering your press-on nails are too large is a common issue, but easily addressed with a little patience and the right tools. The most effective solution is to carefully file down the sides of the press-on nail to achieve a more customized fit. Use a nail file, preferably a medium-grit one, and gently file the sides, checking the fit frequently against your natural nail.
Focus on filing evenly to maintain the shape of the press-on. Avoid filing the area that adheres to your nail, as this can weaken the bond. You can also slightly file the underside of the nail, near the cuticle area, to reduce its overall width. Remember to work slowly and cautiously, as removing too much material is irreversible. A well-fitted press-on should cover your entire nail bed without overlapping onto your skin, ensuring a comfortable and secure application.
Resources for Finding Your Perfect Fit
Utilize sizing kits offered by brands, or explore online size guides and charts for accurate measurements. These tools simplify finding your ideal press-on nail sizes.
Using Sizing Kits
Many brands now offer dedicated press-on nail sizing kits, which are incredibly helpful for first-time users or those unsure of their nail dimensions. These kits typically include a set of plastic nail tips, each labeled with a different size. You simply press each tip onto your natural nails to find the closest match.
The benefit of a sizing kit is its accuracy; it allows you to physically compare the press-on nails to your own nail beds. This eliminates guesswork and reduces the chances of ordering the wrong sizes online. Some kits are even designed as postcards, allowing customers to try on sample nails before purchasing a full set.
When using a sizing kit, take your time and try each size on every nail. Nail sizes can vary slightly from hand to hand, so it’s essential to measure each finger individually. Note down the numbers corresponding to the best fit for each nail – this will be invaluable when you’re ready to purchase your desired style!
Online Size Guides & Charts
Fortunately, most press-on nail brands provide detailed size guides and charts on their websites. These resources typically feature measurements for nail width and length, often presented in millimeters or inches. They often include instructions on how to accurately measure your nails at home, ensuring a successful application.
These guides often categorize nails into standard sizes, numbered for easy identification. Comparing your measurements to the chart allows you to determine the corresponding size for each finger. Remember that press-on nails generally adhere to standard sizing, but slight variations can occur between brands.
When utilizing online charts, pay close attention to the instructions and measurement techniques provided. Some brands offer printable rulers for added convenience. If you find yourself between sizes, it’s generally recommended to choose the larger size and file it down for a custom fit, ensuring a comfortable and secure hold.